If you heard about the cloud, you heard about Amazon AWS. And, probably, you heard about S3. In fact, S3 is one of the flagship products that Amazon has to offer. In this AWS S3 Tutorial, we introduce you to it and explain how (and why) to use it.
AWS S3: Simple Storage Service
Introducing S3
S3 stands for Simple Storage Service (SSS would have sounded awkward). And, as you can guess, it is a storage cloud solution. Of course, since we are in IT, it is a storage for digital content.
To be more specific, it is an online file system accessible through HTTPS. S3 is a file system because you put files in it, just like on your computer. And, just like on your computer, you can organize them in folders and sub-folders. This has also the implication that you can create, download, update, or delete only entire files. You cannot modify a fraction of a file, you have to modify the entire file instead.
You access S3 through HTTPS, the web protocol. Thus, for you and for your application, S3 feels like downloading (or uploading) data from and to a website. In the end, that’s what it is.
The S3 Bucket
In S3, everything starts from the bucket. Yet, the concept of bucket is not complex at all. It is literally a virtual bucket containing all your files.
Comparing S3 to a traditional file system, the bucket is the disk, like C:/. You can have as many buckets as you want, and in each create all the folders and files you want.
Why use multiple buckets instead of a single one with more folders? Because, with buckets, you will have better privilege management. Tipically, different applications use different buckets, each with full control only on its own bucket. For larger applications, one single application may use multiple buckets.
The pricing
Before we start to put our hands in the cloud, we should understand how Amazon prices S3. That’s not hard at all.
AWS bills you for the amount of storage you use, no matter how many files, folders, or buckets you have. Billing is per GB, so if you have 1.1GB you will pay for 2, and it happens monthly. The more data you store, the less it costs (for example, you get a discount on each GB you have after the first 50 TB).
Pricing changes based on where you want your data to be stored. That’s the AWS Region, the AWS datacenter location. However, costs between regions do not vary significantly.
Instead, another key variable in the cost calculation is the class of storage. This dictates how long before your data is available. If you always want your data to be available right now, you will go for the Standard class, which is more expensive. Instead, if you are storing backups and you can wait a few minutes to a few hours before you retrieve your data, you can use a different class and save a lot of money.
If you want to know the actual costs, check out the official pricing page.
AWS S3 Tutorial
Creating a bucket
As we said before, all starts by creating a bucket. Log in into your AWS console and look for the S3 service. From there, you will either see the list of your buckets or a big button to create one if you don’t have any. Either way, the button Create bucket is always present, so click on it.
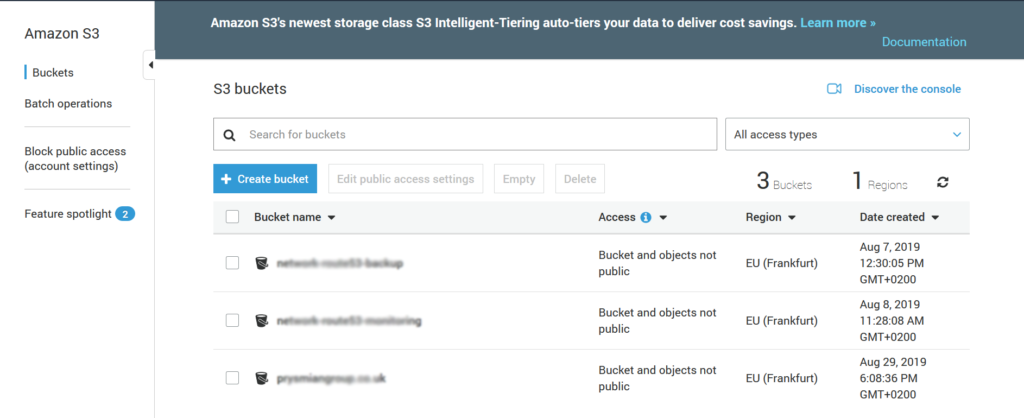
Creating a bucket will trigger a wizard to define the configuration of your bucket. You may change some of these settings later, but note that some settings cannot be changed afterward.
The first thing Amazon asks you is the name of the bucket and its location. Use whatever you need. For the name, I recommend using always the same naming convention everywhere, for example, I am using kebab casing (words separated by dashes).
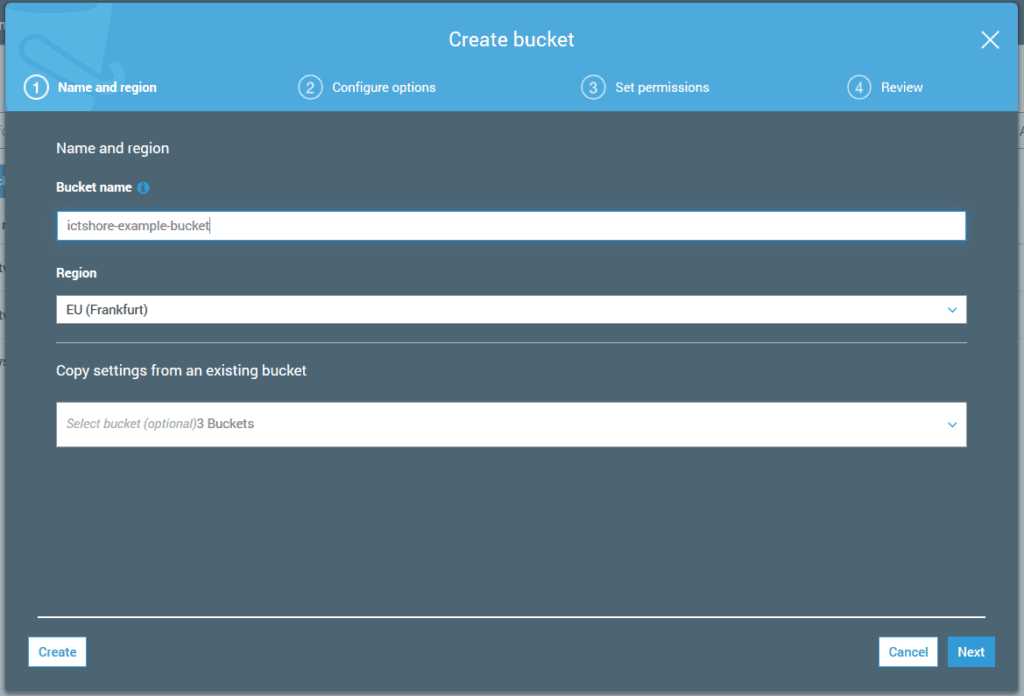
Bucket configuration
In the next step, you can enable versioning, logging, tune the encryption, or write-once-read-many.
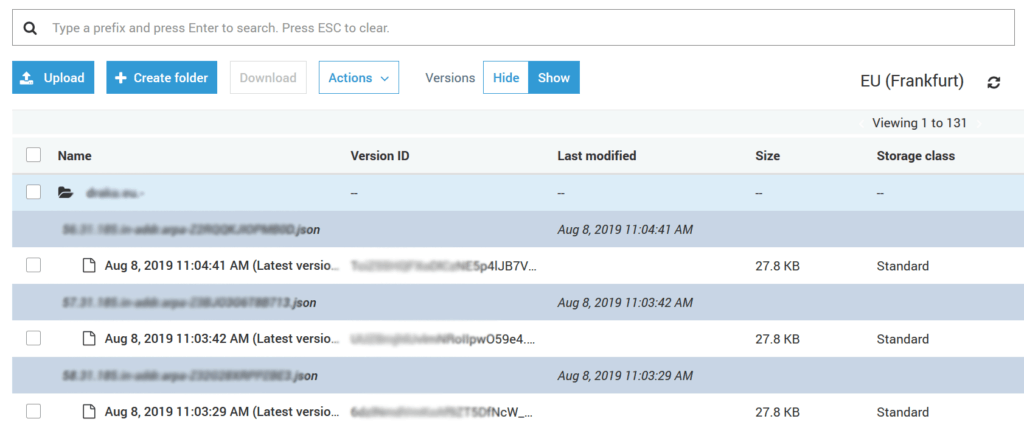
- Versioning, every time you upload a file with the same name in the same location, you don’t override the existing one. Instead, you create a new version of it, and you can later browse all the versions.
- Logging allows you to monitor every time a file was accessed or edited.
- Object lock (write-once-read-many) means that once you write a file, you cannot edit or delete it. This can be important for compliance reasons, where you want an unmodifiable source of truth. Of course, you cannot disable this setting later.
If you just need a simple file system, you can leave everything as is.
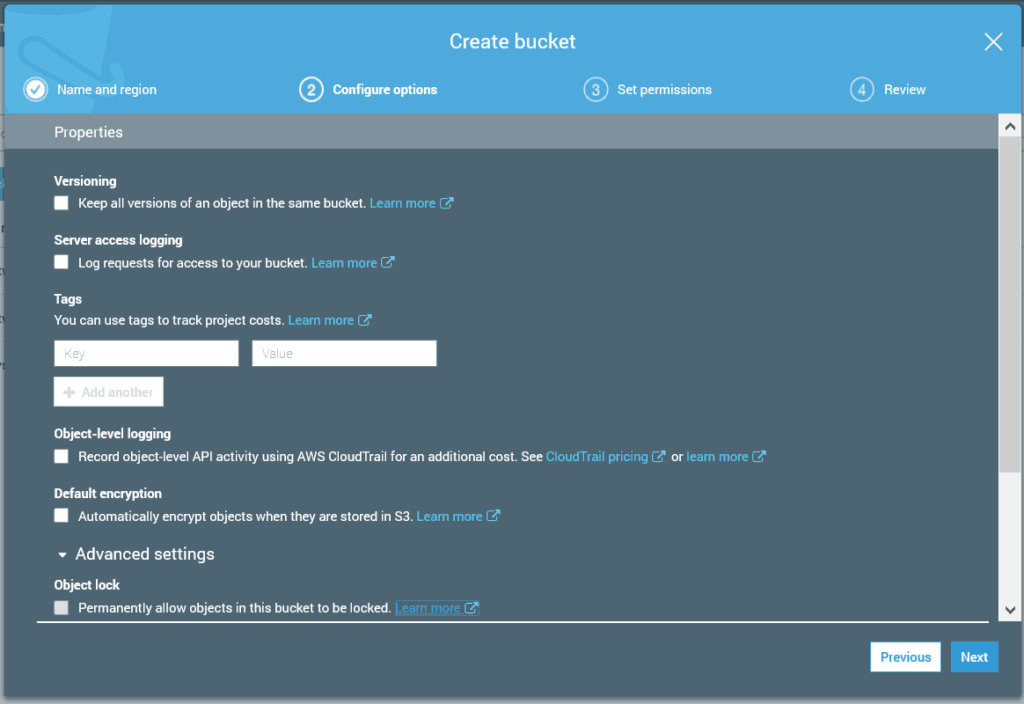
Tagging
Tagging is a common practice, not only in AWS, but in all cloud providers. Thus, it is not something specific about S3. And, in this configuration page, you can also specify the tags.
Tags are pairs of keys and values, where both the key and the value are user-defined. You use them to better categorize and manage your cloud resources later. For example, you may want the key “Project” to associate each resource with the project it belongs to (written in the value of the tag).
I recommend tagging, but if you are only playing a little bit, and you know you will remove the bucket soon, there is no point in doing so. Once you are done, click on Next.
Permissions
Now it is time to define the permissions needed to access your bucket. After all, a bucket is a website, so anyone could access it with its browser. You need to say if you want that (no by default).
A public bucket is accessible to anyone over the Internet, unless you have applied some more custom settings. Instead, a private bucket can be accessed only from other resources within AWS, and from the AWS console. Normally, you don’t need to play much there: either you block all public access, or you permit it all.
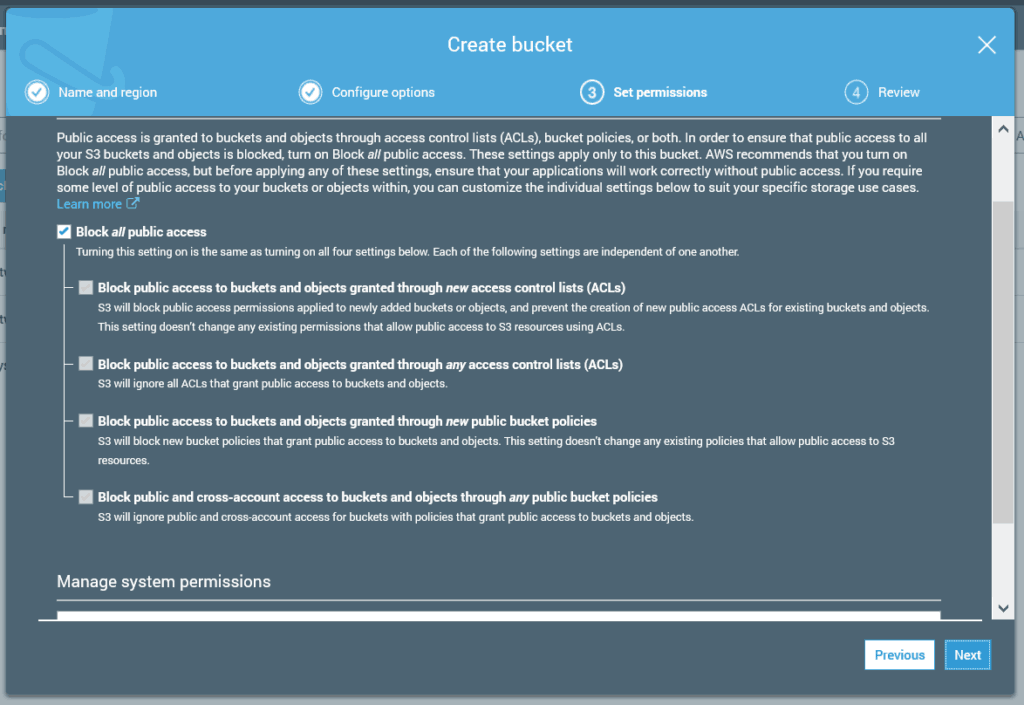
Once you are done, click Next, review the bucket, and finally click on Create bucket.
AWS S3 Tutorial: Using your bucket
The next part of this AWS S3 Tutorial is about using the bucket we created. In fact, once you create a bucket, it will appear on the list of buckets you have. If you click on it, it will open the bucket management. Here, you have four tabs.
Overview allows you to browse the content of the bucket.- Properties section allows you to change some of the initial
configuration . - Permissions section
- In the management tab, you have some settings about the lifecycle of the bucket and some analytics.
Since this is an entry-level tutorial, we will focus only on the Overview tab. Here, browsing your files is easy. If you have a folder, you click on it to see the content. Instead, you can click on a file to download it (there is no built-in preview). In the same manner, you can upload new files or create new folders.
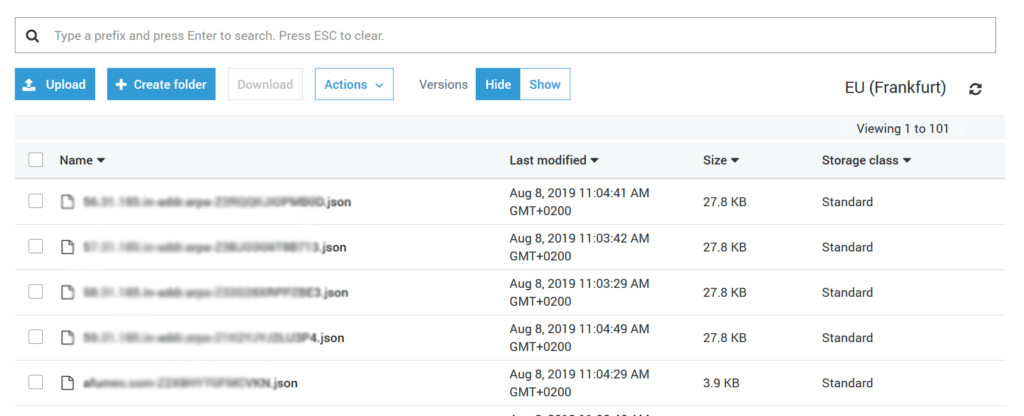
One thing worth mentioning is the versioning feature. If you have it enabled, you can click on a file to browse its versions, or directly see the versions in the list of files by setting the “Versions” switch to “Show”.
Why S3?
As you can see, With Amazon S3 we distance ourselves from the traditional database paradigm. If you want to base your application on S3, you have to think in a different way. Consider the following concerns:
- Only modify entire files: if you want to edit a part of a file, download the entire file, edit it, and upload it again overriding the old.
- You cannot “query” S3 looking for some generic data.
- No native indexing or way to search for records in a way similar to a SQL.
Thus, you simply cannot replace your SQL with AWS S3 alone. However, for some parts of your application, S3 can be a great match, because of its advantages.
- Virtually unlimited scalability.
- Natively works with files, if your application is based on files we have a great match.
- Can store huge amount of data.
- S3 is natively accessible through HTTPS, and this is a good match for static contents used for websites, or caching of it.
- Storage can be very cheap, a good solution to store backups in the cloud.
In the end, you are the one who needs to evaluate your actual needs and decide if AWS is the right solution for you. This goes far beyond the goals of this AWS S3 Tutorial. Have you ever tried S3 in a real-world application? What are your feelings?