While users rely on the GUI, system administrators prefer the command line. Why is that? If you know what you are doing, using the command-line interface (CLI) is faster. In fact, it is like having a chat with your PC. You write, the PC executes and gives you a response. Then, you write again a new instruction and so on. This is simply better than having to drag around your mouse, taking a hand off the keyboard. Of course, to be fast you need to know your CLI. Indeed, you may want to extend your CLI to have some custom features. That’s what we will do today, creating a custom prompt command for Windows.
The basics
BAT files
If you open the command prompt, you have a set of predefined commands: cd, dir, netstat and so on. Those are the default commands that Microsoft provides, but you can add some automation with BAT files. A BAT file is simply a text file containing a set of instructions the prompt will execute. For example, we can create example.bat and write in it the following code.
@echo This is an example command
@pause
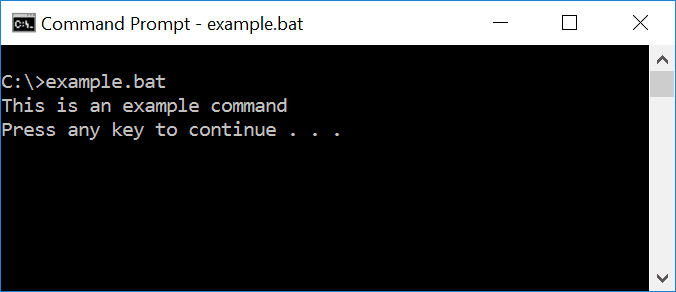
If we run it with example.bat command, we will get the following results. Note that, to run example.bat, we need to open the prompt in the same location where example.bat is. In our case, the file is in C:\.

Having to move to the folder where the script is can be painful. In fact, we want to have our script handy every time we need to. We can do that by putting our example.bat file in C:\Windows\System32. In this way, you will have the command available everywhere, anytime.
The PATH Variable
If you have a lot of scripts, your System32 folder can become overcrowded. In fact, here your scripts will have to share spaces with a lot of system files, and things can get messy really quickly. A much better approach is using the PATH system variable.
PATH is a system variable that lists several paths inside your system. It tells Windows where to look for scripts, so you can have your scripts in a location which isn’t System32. You can add as many paths as you’d like to this variable, one per line. You can edit PATH from the CLI, but the cleanest way is from the GUI in this case.
- In the start menu, search for This PC and right-click on it. Then, select Properties
- On the left menu, click on Advanced system settings
- Click Environment Variables…
- Select Path from the top list, then click Edit…
- Now click New and write the path where you want to put your scripts. Personally, I recommend using a dedicated folder when you will have nothing but scripts.
Once you edit the PATH variable, you need to restart the prompt to start using the changes.
Custom prompt command at the next level
Now we know how to use BAT files, yet we don’t know how to write them. However, bat files have very limited features. Their scripting language is pretty old, and doing complex stuff may simply be not possible. Instead, we want to use our preferred programming language to write our custom prompt command.
We can do that and have the native CLI experience as well. To do that, we are going to use Python in this tutorial, but any other programming language will do. We just used Python because it is great for scripts. Just read on…
How to create a custom prompt command
Starting point
Coming from the previous section, we should have a folder that we will dedicate to scripts. We should have this folder added in the PATH variable, and we should have restarted the prompt. If you did all of that, you are ready to go.
Our custom command will be made of two key files:
may.batA BAT file to call our Python file, which is the actual scriptmay.pyis our Python script, the code we actually want to execute. In our case, this script will look for python modules in the folder and treat them like commands.
We will then be able to call our command by writing may anywhere in the prompt. Of course, you can use the name you want by simply renaming those files. I used “may” as that’s the translation in English of my surname (meaning the month of the year).
A BAT file to call another file
This is the core part of our custom prompt command. In fact, the python file is the actual script. Instead, this bat file is the file that triggers the python file. In other words, this is the file you need in any case – no matter what you want to do.
The content of this file is very simple, as you can see below.
@echo off
python %~dp0/may.py %*
The first line means we don’t want to show the user the actual commands that this bat file gives. We only care about the results. If we don’t do that, we will see something like python C:/scripts/may arg1 arg2 just after we typed may arg1 arg2. We don’t want that, it’s unnecessary and ugly.
The second line tells our python interpreter to execute the may.py file in the same folder of the bat file (that’s why %~dp0). We also tell our system to pass any parameters the bath receives to the python file (that’s %*).
You can apply the same approach, for example, to PHP files by replacing python with PHP. Of course, the file must be PHP and you must have the PHP interpreter installed.
A Python CLI Utility
Our script is not a simple script. It is a script that can do several things, based on the parameters we give to it. Specifically, it brings several custom python modules to the CLI, and let you work with each. You can add your own modules at your liking, effectively creating your commands in Python, not in BAT. Our may script is simply the dispatcher.
Here is a preview of our main function.
def main():
  # No extra keyword, print general help
  if len(sys.argv) <= 1:
    print(general_help())
  # Extra keywords, can be may parameters or script parameters
  else:
    # Asking for the manual
    if sys.argv[1] == "manual" and len(sys.argv) == 3:
      try:
        doc = __import__(sys.argv[2]).__doc__
        print(doc if doc else "")
      except ModuleNotFoundError:
        print("ERROR: Script not found")
    # When all previous check fails, we are calling a script
    else:
      try:
        # Remove "may" and script name
        args = sys.argv[2:]
        __import__(sys.argv[1]).main(args)
      except ModuleNotFoundError:
        print("ERROR: Script not found")

if __name__ == "__main__":
  main()
Basically, if the user simply called may we will show a general help. Instead, if the second parameter is manual and we received three parameters it means the user wants to read the manual of a command. So, we try to import the command ad get its documentation (the docstring, for those of you into python).
If we are in none of the cases described above, we want to run an actual script. We try to import it according to the script name and then pass it the arguments (see the line __import__(sys.argv[1]).main(args)).
The full Python Utility
Of course, the script above is just a fraction of our Python file, which is about 200 lines long. It contains functions to display the help, automatically discover modules in the folder, and so on. You can get your entire file from GitHub by clicking here.
Using our custom prompt command
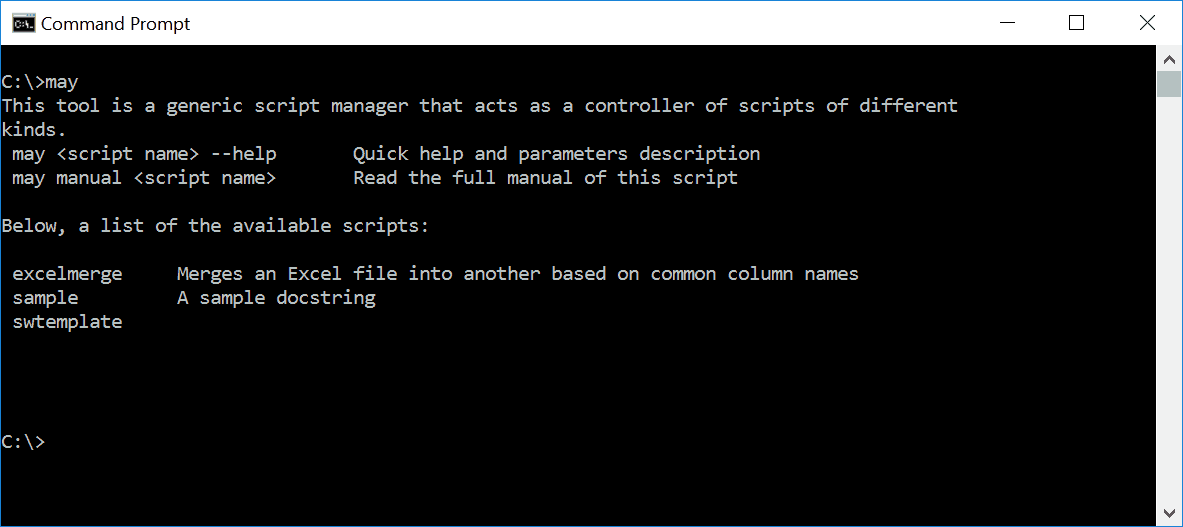
Now that everything is set up, look at the magic that happens when we give the may command in the prompt.

If you look on GitHub, you can download the entire folder. It comes with a useful sample.py so that you can see how to add your Python scripts into the folder.
A conclusion on our Custom Prompt Command
Now we know how to create a custom prompt command and add it to the Windows CLI like a native script. From there, the sky is the limit. You can create your own commands that do the things you want, in the way you like. I personally find it useful to automate some Excel processing, file generation, and some little more.
What do you think about having custom prompt commands? Which kind of tasks do you want to automate in this way? Let me know your opinions in the comments!