
In DevOps, we want full automation for software shipment. In fact, moving new source code to the production servers must be effortless. CI/CD does just that, by automating the build and release process. We already saw how to automate the build, now we see how to automate the release. Furthermore, we see how to do this for free, thanks to an azure release pipeline.
Note that, to create an azure release pipeline, we need to create a build pipeline first. That’s because a release pipeline takes care of pushing code to production servers. However, this code needs to come from somewhere: the build pipeline. If you don’t have a build pipeline, follow this tutorial to create an azure build pipeline.
Azure Release Pipeline
Setting you up
As you can imagine, to create a release pipeline in Azure, you need to register there. This is easy and free, and you can do it at azure.microsoft.com. In the registration, they will ask you a credit card, but they will charge nothing for DevOps. Once you registered, you can access the DevOps portal (click on “Start Free” to enter).
At this point, you absolutely need to follow the tutorial on creating an Azure Build Pipeline. This is because the build pipeline creates an artifact, a piece of code packaged for delivery on a server. The role of the release pipeline will be to take the artifacts coming out of the build pipeline and push them to a server.
Your first Azure Release Pipeline
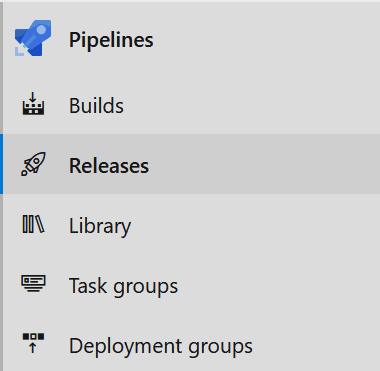
To create a pipeline in Azure, you need to use the menu on the left to navigate into Pipelines section. From there, select Releases.
If you don’t have any pipeline, the only thing you will see in the page will be a button to create a new one. Instead, if you have some pipelines, you will see them grouped in a folder-like structure. If that’s your case, the button to create a new pipeline is on the top left of the page (New > New release pipeline). Use the button to create a new pipeline. The canvas to create/edit the pipeline will open, and you will be asked to select a template. The template is nothing more than a pre-configured pipeline to do a specific task. For example, you can have a template for a PHP application. You can use the search box to tune your research, and available templates will appear in the list below. Instead, for this tutorial, we go with an empty job from the top of panel on the right.

At this point, we are ready to edit our release pipeline.
Azure Release Pipeline Editor
Once we select a template or empty job, we will see the interface that allows us to edit the pipeline itself. In this space, we can define what are the steps Azure needs to take to deliver the code to the servers. In other words, here we define the Continuous Delivery process.
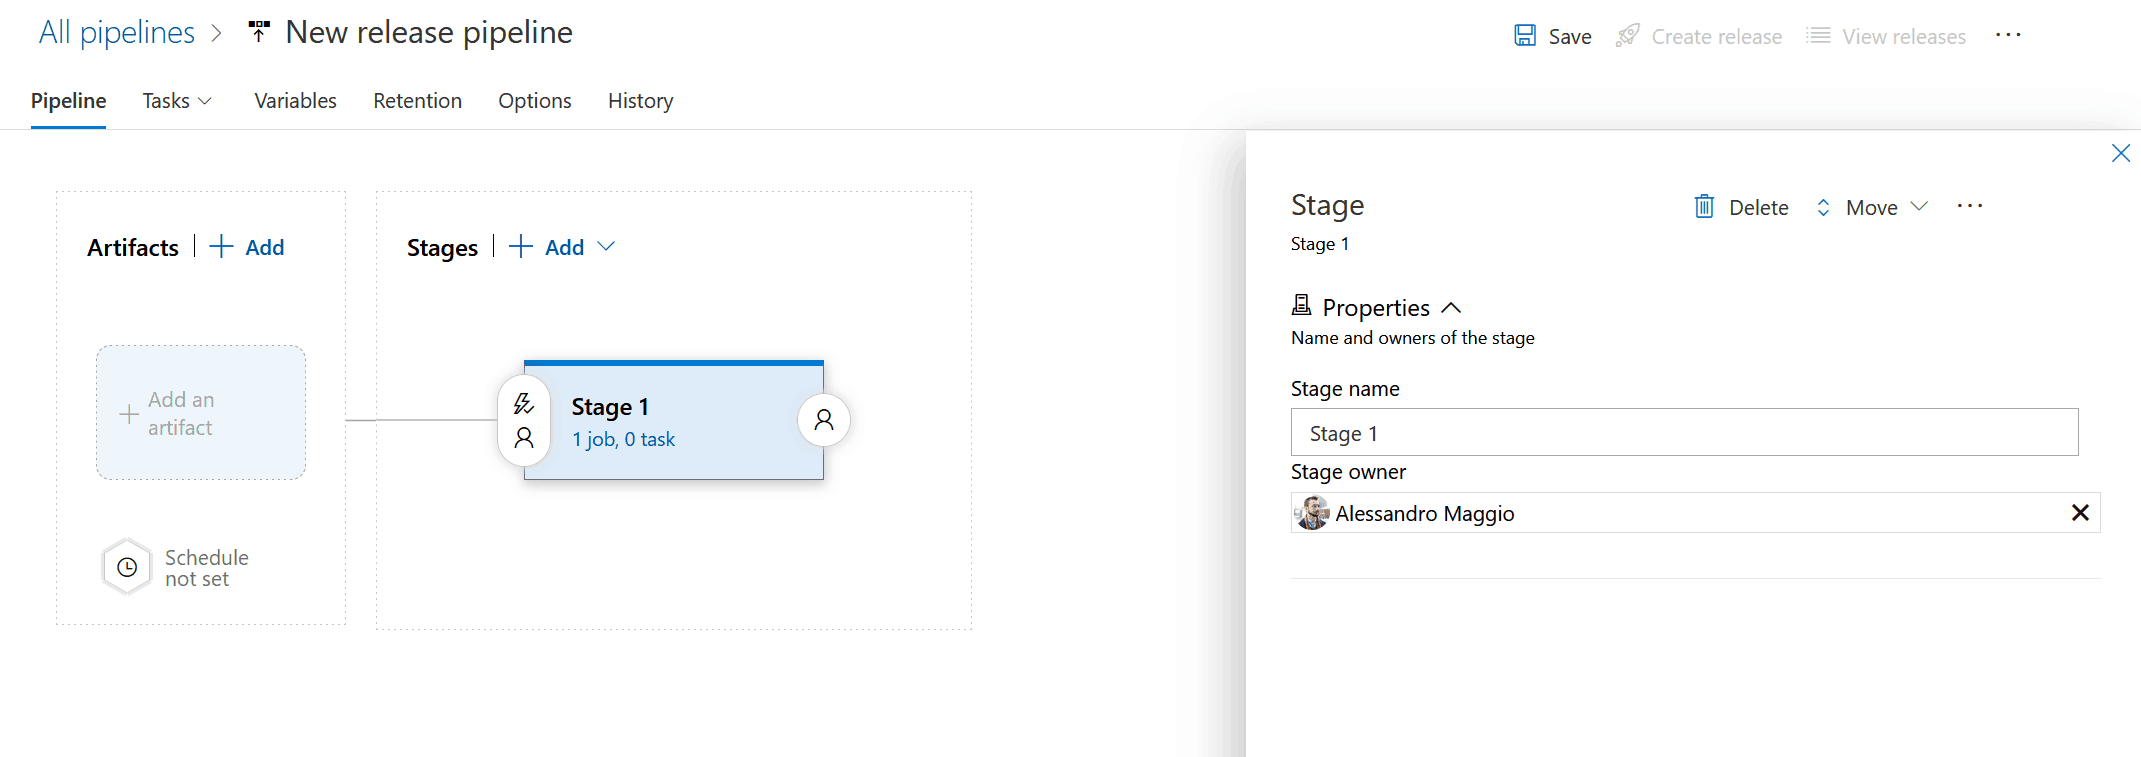
As you can see, at the top left we have the name of our pipeline, which is New release pipeline for now. You can click on that to edit it. Then, right below we have several tabs:
- Pipeline shows the step of this pipeline in a flow-chart
- Tasks allows you to edit the individual tasks in every single stage. We will see what a stage is later.
- Variables contains a table of, guess what, variables, to use in the pipeline. In this way, you can write your tasks with reference to variables, and concentrate all the values in a single place.
- Retention, Options, and History shows you some information about your pipeline.
Now we are in the Pipeline section, and we have a simple flow chart starting from an Artifact. However, no artifact is selected. After that, we have a stage that we have selected, Stage 1. The artifact panel connects to the Stage, meaning that the artifact will go to Stage 1 when this pipeline starts.
Adding an artifact
For the pipeline to actually do something, we need an artifact. In fact, the release pipeline pushes this artifact to a server and configure the server to run the application. Thus, it makes sense that the first thing is to define which artifact. However, an artifact is just a piece of code. With the time, we will create newer and newer versions of that code. So, Azure doesn’t want to know a specific artifact. It wants to know the build pipeline that produces the artifact. If we click on Add an artifact, a new panel will appear on the right.
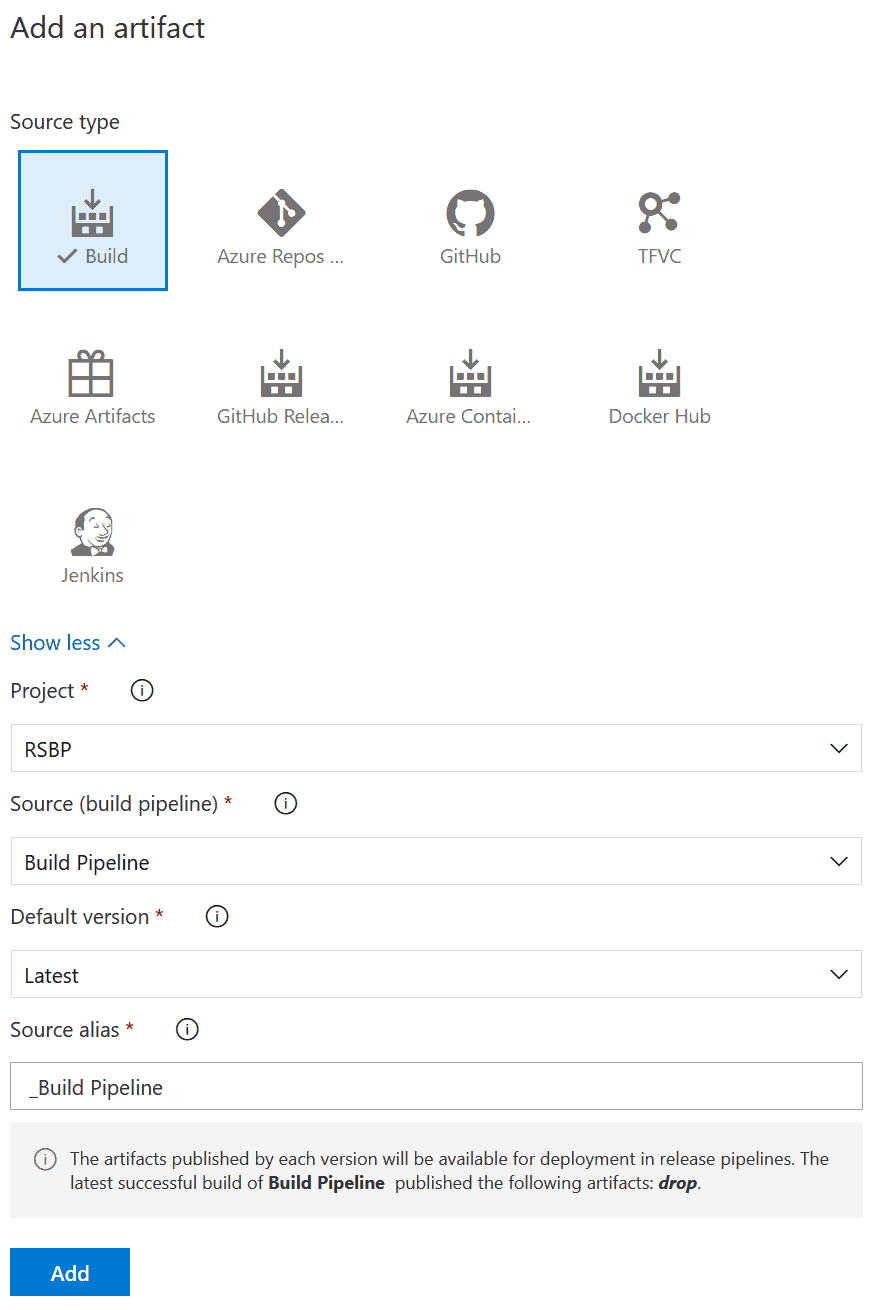
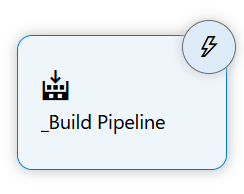
Here we tell Azure where our artifact is. In our case, we want to use our build pipeline that we already created, named “Build Pipeline” in my case, and use the latest version. We name this artifact “_Build Pipeline”, and this name will be available later in our release pipeline. Once all the settings meet our need, we can click on Add.
Now, our pipeline knows where to take the artifact. However, it does not know when to run. It means we can only run it manually, which is not ideal for our CI/CD process. To configure an automatic trigger, we can click on the lightning bolt on top of the artifact name.
Here, you can enable a Continuous Deployment trigger, which runs the release pipeline every time the build pipeline runs. We can also set filters, for example doing that only for specific branches, like dev or master.
Stages
After the artifact, we have the stages section. What is a stage, and is it different from a task? Well, a stage is a set of tasks that finish a deployment. In fact, a simple pipeline can have just one stage with several tasks. Why is this important? If you are really in CI/CD, you want to do some tests in different environments. So, you may want to put your code in a test server first. If this server is working, then you proceed to delivery it in a quality or pilot server. After that, you can finally put it in the production server.
So, a stage is an environment where you make the deployment. You can deploy to a stage, and then sequentially to another, or even deploy multiple stages in parallel. Generally, you name stages in the following ways:
- Production is the stage where you have all users., and you want to deploy there only when you are 100% sure everything is okay.
- Pilot is a stage where you have some real users from production. You can consider them beta-testers, they get new features first, but they may get some bugs as well. Generally, you don’t want more than 10% of the total users in the pilot.
- QA, short of Quality Assurance, is a server where you don’t have users. Instead, you have some business testers check everything is ok, check the quality of the release. Those testers are generally not developers, and they test the overall user experience.
- Test (or dev) is the stage where you have some developers connect and do some tests.
Combining stages
The sequence of stages, of course, is Test, then QA, then Pilot, then Production. Except production, you can omit some of the stages to fit your needs. While this is the sequence, you may want to run multiple QA stages in parallel and make multiple groups of people do the same tests. In that case, after tests, you can have (at the same time) QA1, QA2, and QA3. This makes the release more “expensive”, as you have many people doing the tests. Still, it is an approach you can follow when you cannot tolerate errors. For example, it is common in finance.
You can also put approvals before or after releases. In this way, you will need manual input before progressing to the next stage. This will allow you to have the time to do the tests on the previous stage before continuing to the next one.
Tasks
Once you define the stages, you can click on any of them and edit the tasks it contains. You will have an agent job, that you can configure to run on different OS. Then, using the plus sign on the right, you can add tasks that the agent will run. These tasks include extracting zip files, creating Kubernetes containers, performing CLI commands, upload files with FTP and more. Azure keeps adding new and new features, and it is impossible to make a complete list. Furthermore, external developers can add additional tasks that you can find in the Azure marketplace, often for free.
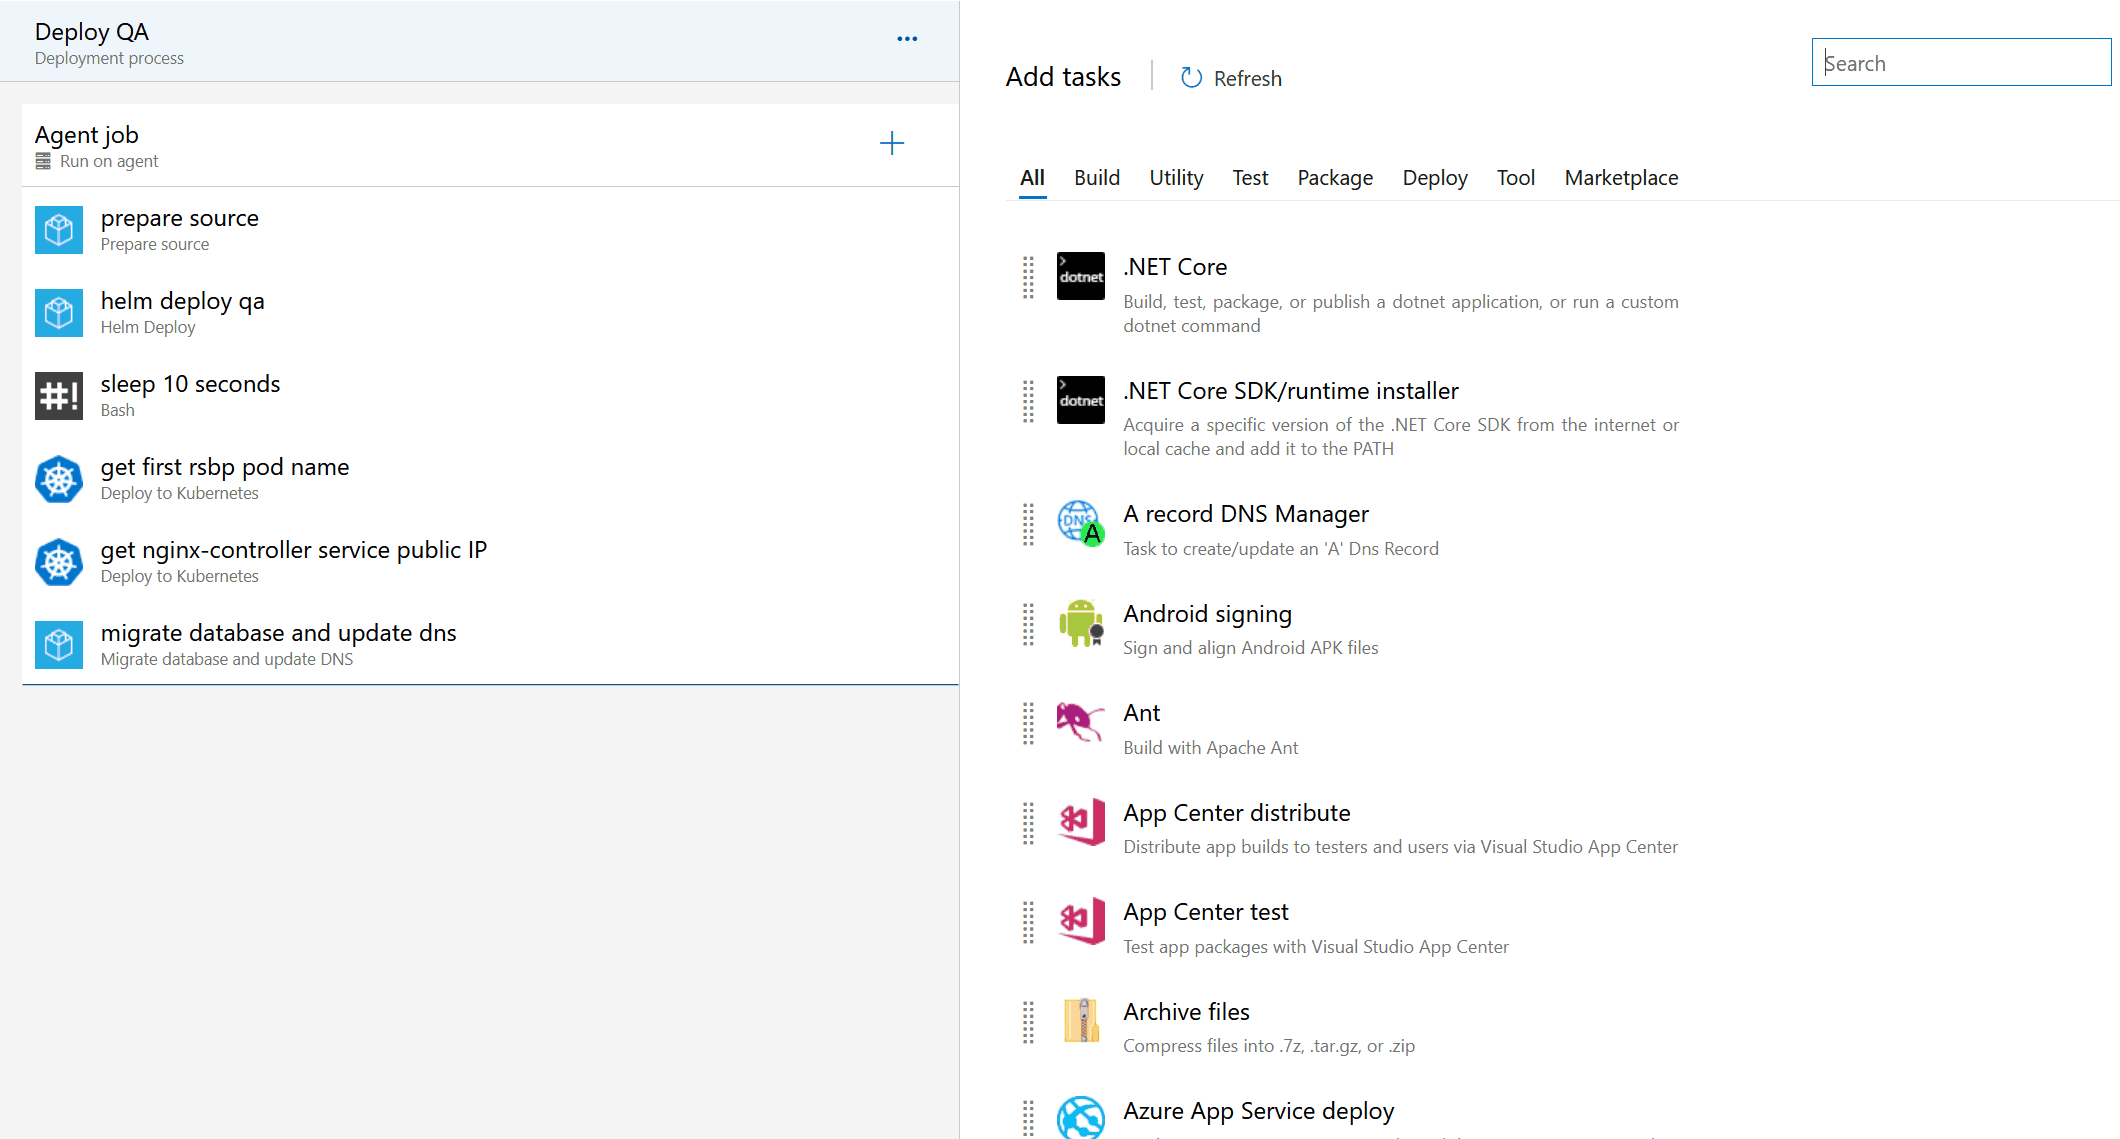
Once you select a task, it will appear in the list of the left. As you an see, here we already have some tasks. Furthermore, you can click on the individual task on the menu on the left to edit its setting or remove the tasks. For example, if you want to do an FTP upload, you will need to specify the target FTP server.
Variables
Inside your tasks, you can specify some settings like the target FTP server. You can simply put the value you want, like ftp.example.com, but this is not really a best practice. In fact, if you are embedding your configuration inside the pipeline. Ideally, the pipeline should define only the process to release the software, not where to release it. So, you may want to use some placeholders. You can do that, thanks to the variables. In any text field of any task, you can use the syntax $(variableName). When running the release, Azure will replace the name of the variable with its value.
Azure provides some default variables you can use, like Build.Id. You can find all the list in the official documentation. However, you can also create your own variables in your Variables tab. It is interesting to know that you can scope the variables to the stage. In other words, the same variable can have a different value for different stages.
Creating your first release
In your release pipeline, you can click on create release on the top right.

It will ask you to provide the Build ID of the artifact you want to run your release for. It will also ask you for a description for the release. After you provide that, click Create and your release is ready to run. You can see its progress directly in Azure, and it will look something like this:
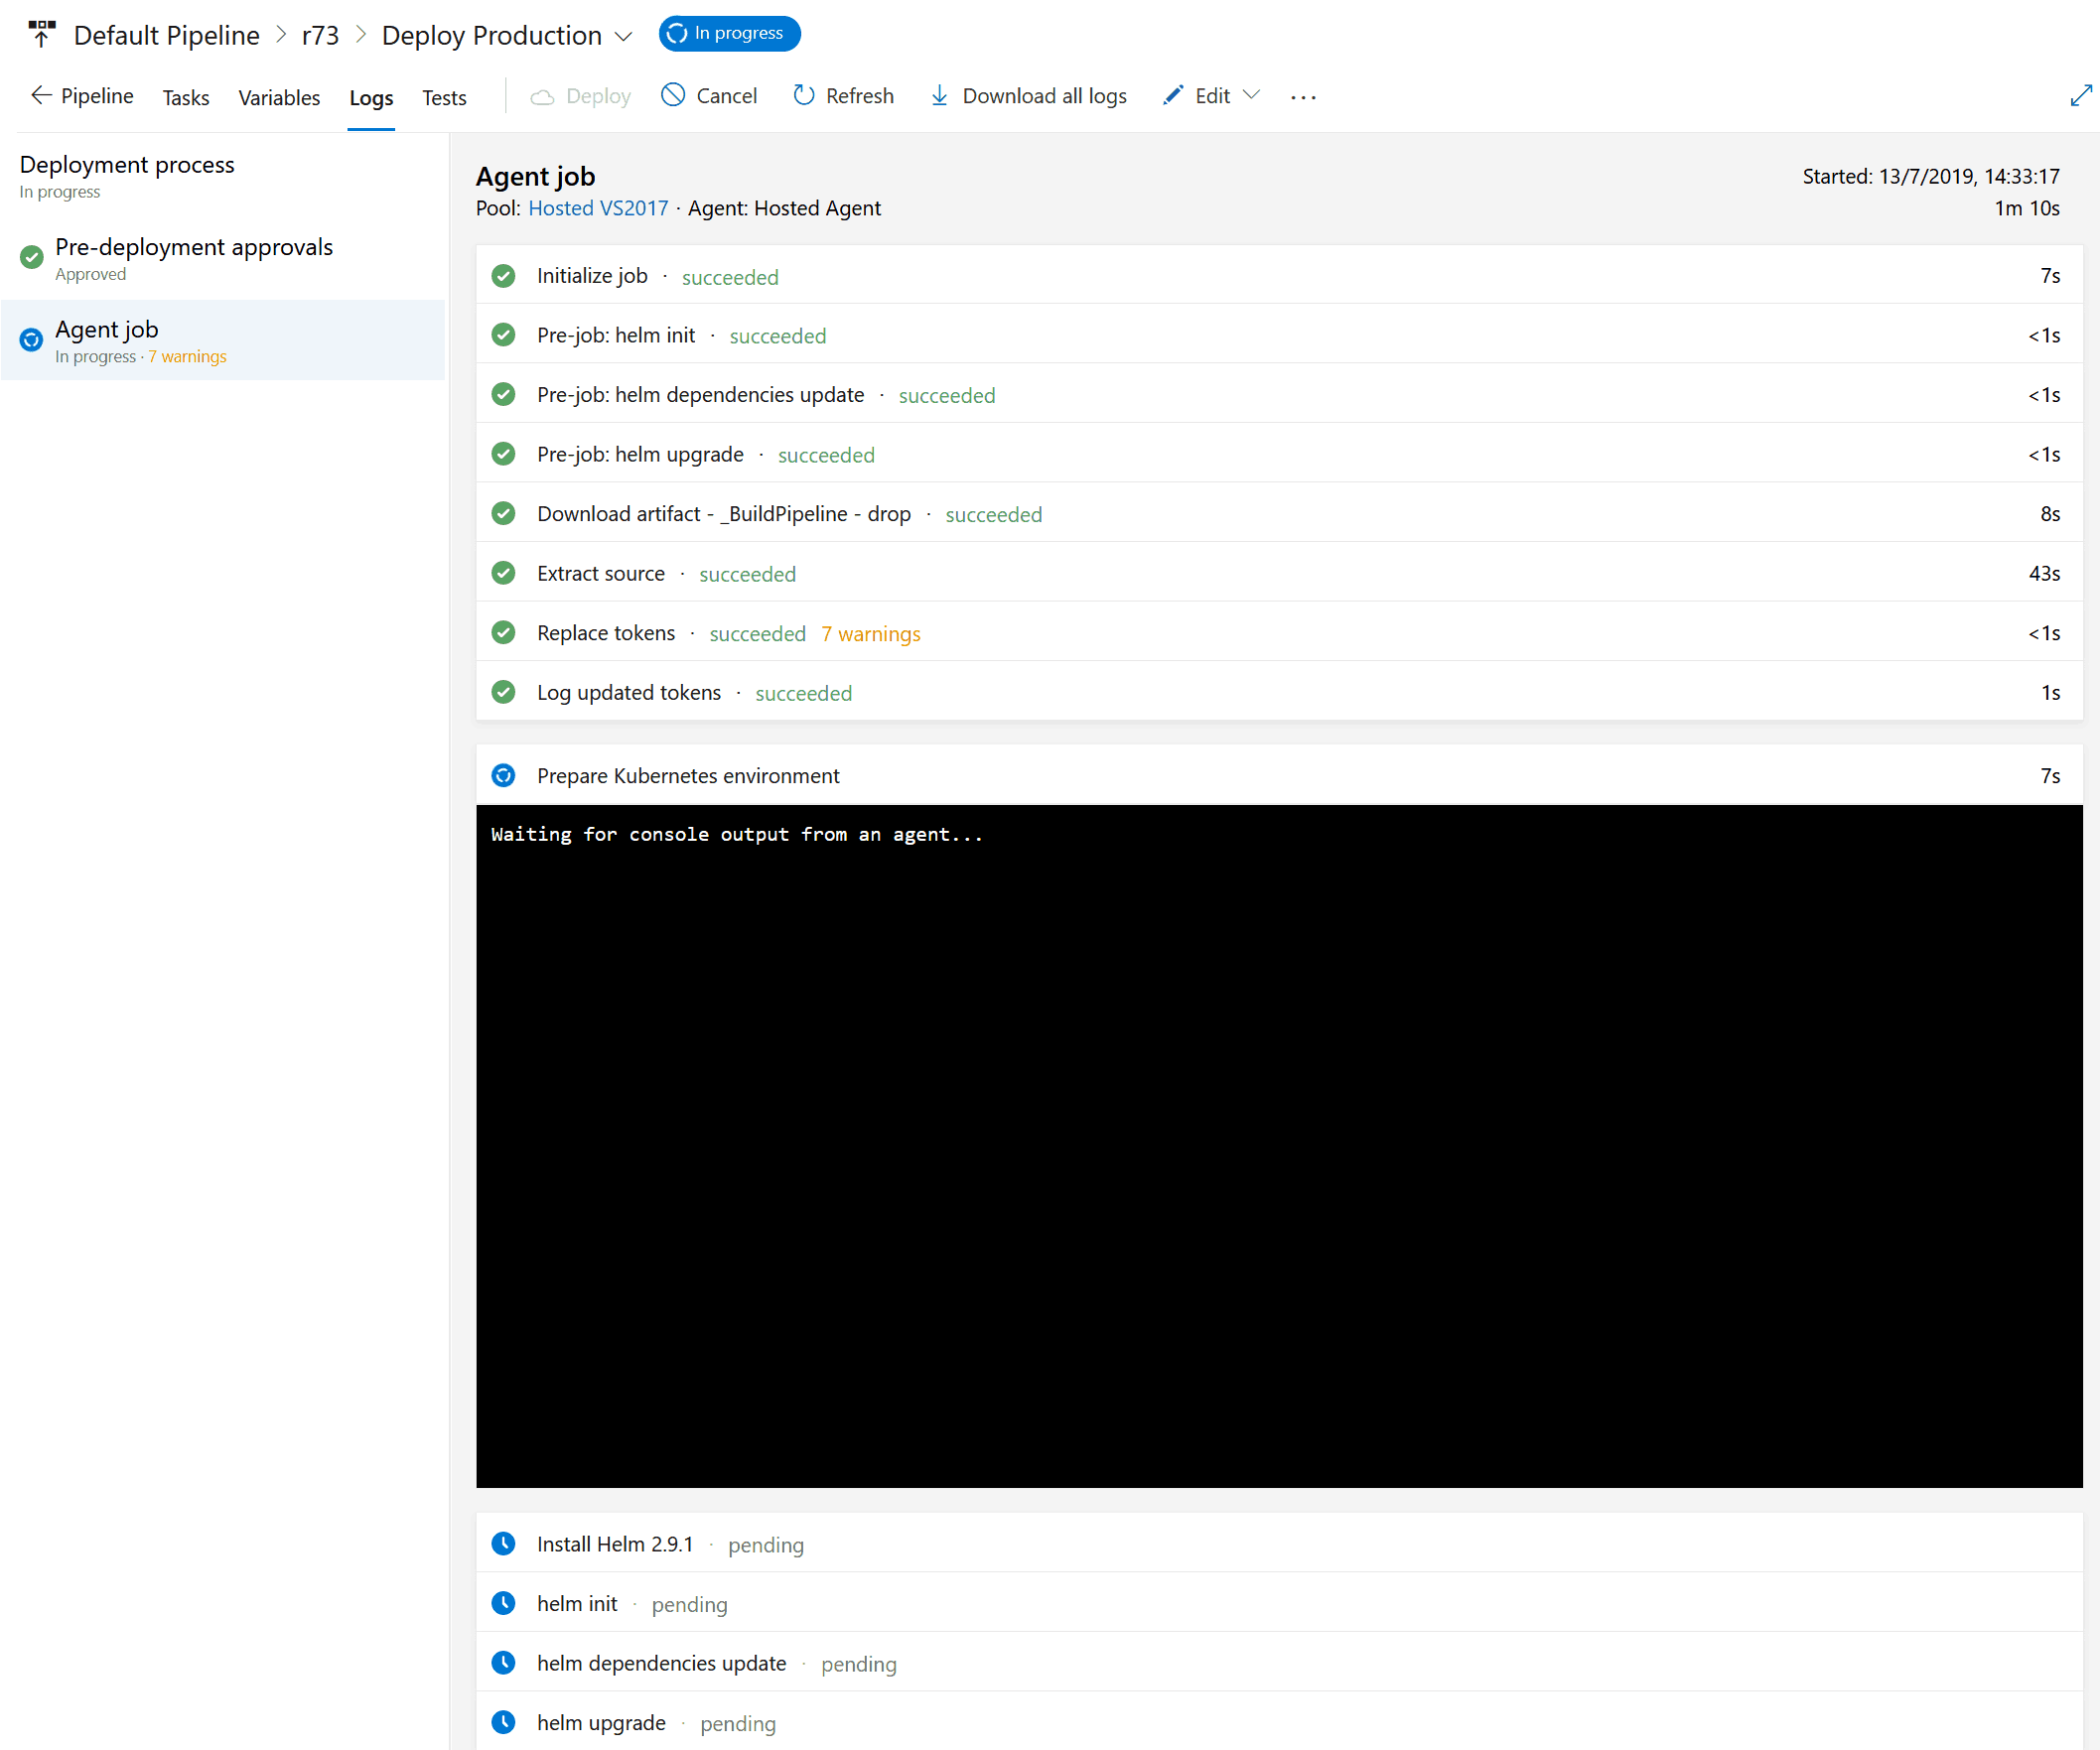
Once the release finishes, you should have your application working in the desired server.
In Conclusion
With Azure, you can implement a full CI/CD process for free, in the cloud. It includes all the features you need, from multiple OS and environments, to pre-deployment approval and parallel tasks, not to mention variables. With an Azure Release Pipeline, you can ultimate your automatic delivery process by connecting this pipeline to the build pipeline.
What do you think of Azure release pipelines? Let me know in the comments.
