Today we explain how to do email automation quickly and cheaply. I wrote this guide because every other guide you find online seems to be biased: the guide on Zendesk.com will tell you that the best tool ever (even compared to others) to automate email is Zendesk. People from HubSpot disagree, they say HubSpot is better. So let’s go with an unbiased guide on email automation.
What is Email Automation?
Before we start talking about email automation, what are we trying to achieve? A definition can help us here.
Email automation is the act of automatically sending an email when a specific event happens, with no human intervention.
A website visitor subscribes to your newsletter, you send a welcome email. A client purchases something, you send a thank you note with the order details. The patient will have a doctor’s appointment tomorrow, you send an email reminder. There is an event (newsletter subscription, purchase, upcoming appointment) that triggers an action (email).
So, this process has two parts: realizing the event happened is the first one, sending the email is the second one. If we want to be more specific, the first one has two key items: realizing the event has happened, and fetch from the event the information needed to create an email (most importantly, the destination email address, but also the information you want to put in the email).
What Are You Willing to Pay For?
Sending email is not free and will never be. This is because sending an email requires an email server to be powered on and ready to forward your requests through the Internet. But, most importantly, that server needs to be trusted by receiving servers so that you are not marked as spam. Long story short, setting up an email server on your own computer is a non-starter.
So, there is one cost that you will need to have: the cost of sending the email itself. Here you have many services with different pricing models, but the cheapest is AWS Simple Email Service (SES). SES costs 0.0001 USD per email sent, with the first 62k emails in the month free. That is, every month you can send up to 62 thousand emails for free, and then pay 10 cents every 1000 emails. Not bad, right?
The caveat with SES is that it is an API. You need to configure it, and then write some code to use it, you need to program a little bit. It is so cheap because you pay for the only thing you need: the email service. What if you want something to visually prepare the content of emails and add some rules “if this happen send an email” through a graphical interface.
MailChimp is one popular option that allows you to send up to 1000 emails per month for free. Then, you have to upgrade to reach 5000 monthly emails at $13 per month. That is $2.6 every thousand emails, AWS would still be free at this price range. To compare with AWS, we need to compare the highest pricing bracket for MailChimp, at $350 a month for 150k emails. You can send the same amount of emails at the cost of $8.8 with AWS (excluding attachments). A whole different magnitude.
Another option, popular in WordPress sites, is MailPoet. There you are billed per subscribers, not per emails. It stays in the same price range of MailChimp, with $60 for 1000 subscribers (assuming you send one email per week, that is $60 for 4000 emails only).
So, what are you willing to pay for? If you just want to pay (possibly nothing) to send emails, go with AWS SES. If you want someone else to provide you fancy software to hook things up, go with MailChimp, MailPoet, Zendesk, Zapier, or whatever you like. In this guide, however, we are going to do email automation the frugal way, so we are sticking with SES.
Also because, keep in mind that pre-packaged software may not fully integrate with whatever you are trying to achieve. With SES instead, you can quickly glue a few lines of code wherever you need: it will work with any platform you have.
How To Do Email Automation for Free with SES
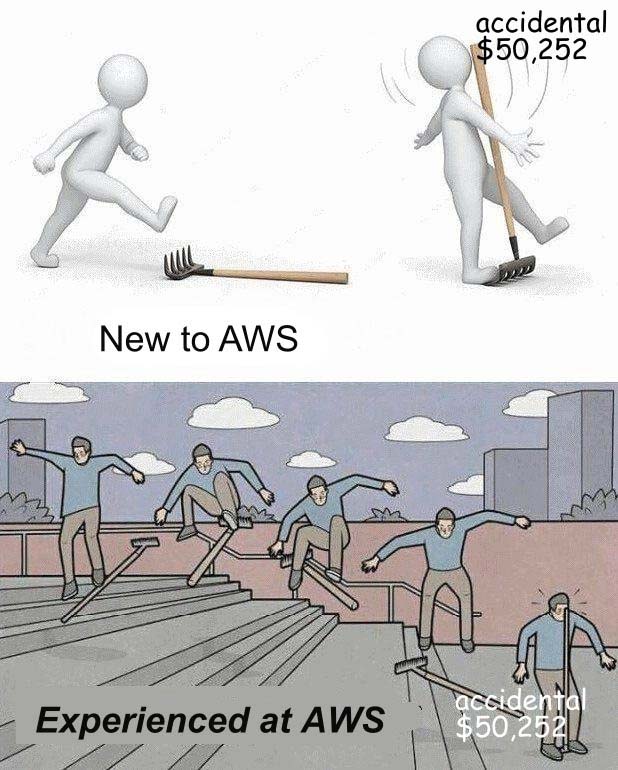
Catchy title, but it is free only up to 62k emails per month. Reader beware, see meme for more details from r/ProgrammerHumor.
There are a few parts to this:
- Configure SES so that it can send emails from your domain (e.g. ,example.com)
- Create some credentials to access SES that you can use in your code
- Integrate SES in your code to send the email you want, when you want it
Not too bad, huh? If you are already familiar with programming, even if not an expert, you can be up to go in one hour up to half a day, depending on how many integrations you want to configure. So, let’s start with email automation with SES.
Before we start, a note: you need to have a domain you own and can control the DNS settings of. A domain is the root URL of a website, like example.com or ictshore.com. If you don’t have one, you can buy one inside AWS Route 53 service.
0. Register an AWS Account
Do you have an AWS account? Skip to step #1 (that is not an Amazon.com account anyway). If you don’t have one yet, you should create one for free now.
Visit the AWS Console to register your free account (click on “Create a new AWS account” at the bottom) and follow the steps. It will ask you some information, a credit card to bill you the costs (nothing will be charged unless you start to buy services on top of the free ones), and you will be good to go in minutes.

Once you registered, you can log in again at the same link by selecting “root account” as type of login.
1. Configure SES for email automation
Now that you have an AWS account, we can start using its services. Particularly, we will configure SES so that it is authorized to send emails from our email domain.
Start by going to Simple Email Service inside the AWS Console (or search the service in the top bar). You will see something like this if you did not configure anything inside SES before.
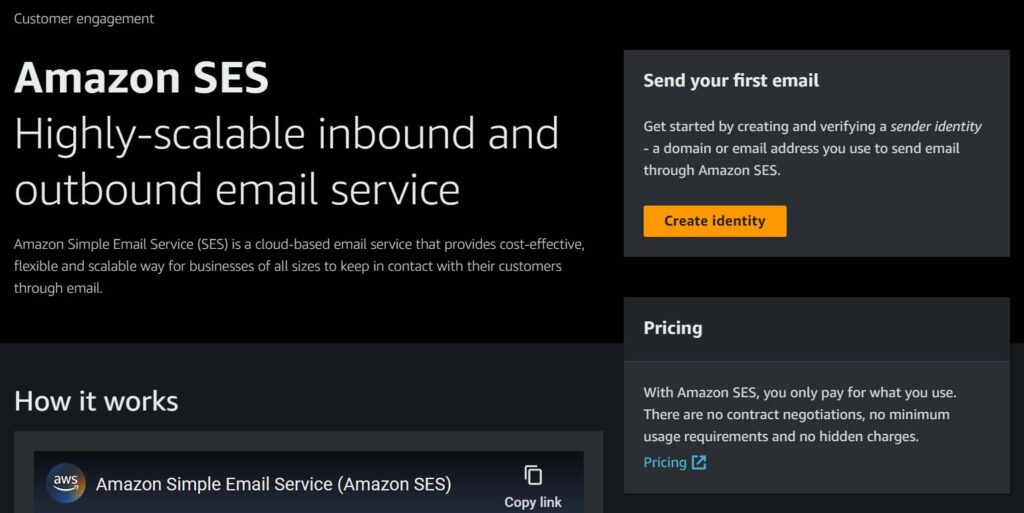
You have only one button to click: Create identity. The identity, or verified identity, is the object inside AWS that can send email. It can be a domain, such as example.com, or a specific email address, such as info@example.com. AWS will verify you own that domain or email address, and once it does you will be granted permission to use it to send emails. If you verify a domain, SES can send emails from any email address on that domain – even non-existent.
Before you start creating your identity, pick the AWS region you want SES to run on. That should be ideally close to your servers and your users. You can do that in the top right corner.
Caveat for receiving emails. AWS SES can also receive email, this is used if you want a “reverse” automation, that is you receive an email and trigger a workflow based on that. Only Northern Virginia, Northern California, and Europe (Ireland) region support this feature as of Apr 2023. We are not dealing with email reception in this tutorial, only email automation anyway.
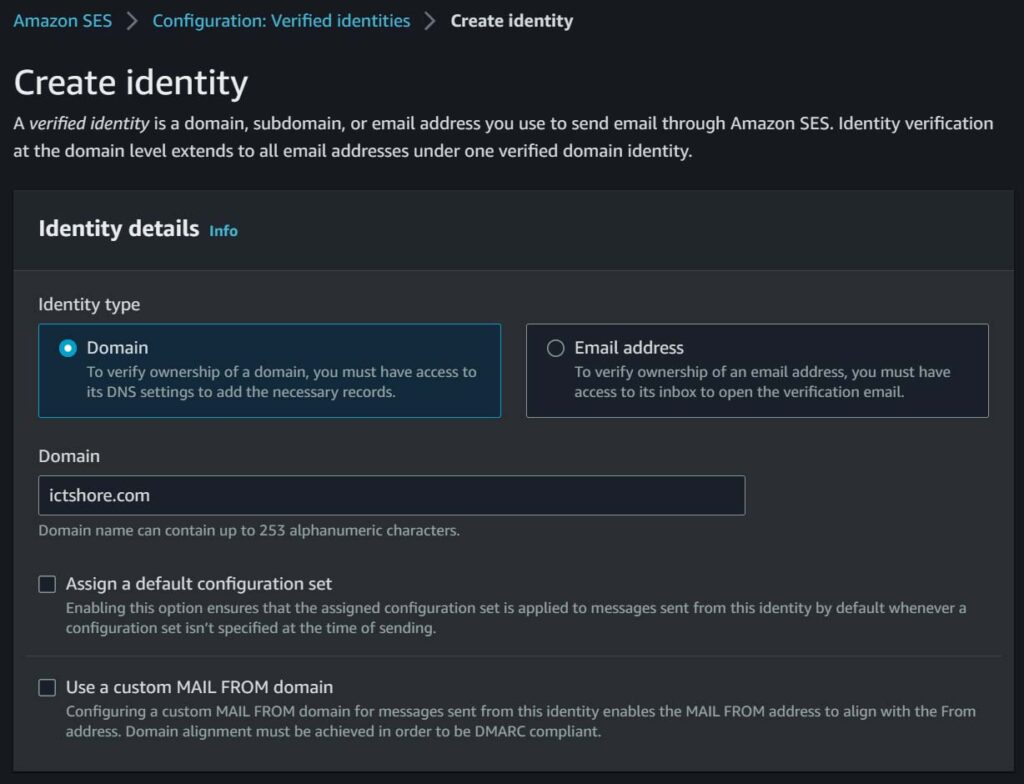
Configuring the identity is easy, you just need to define your domain, which must be a domain that you own and then scroll at the bottom and click “Create identity”.
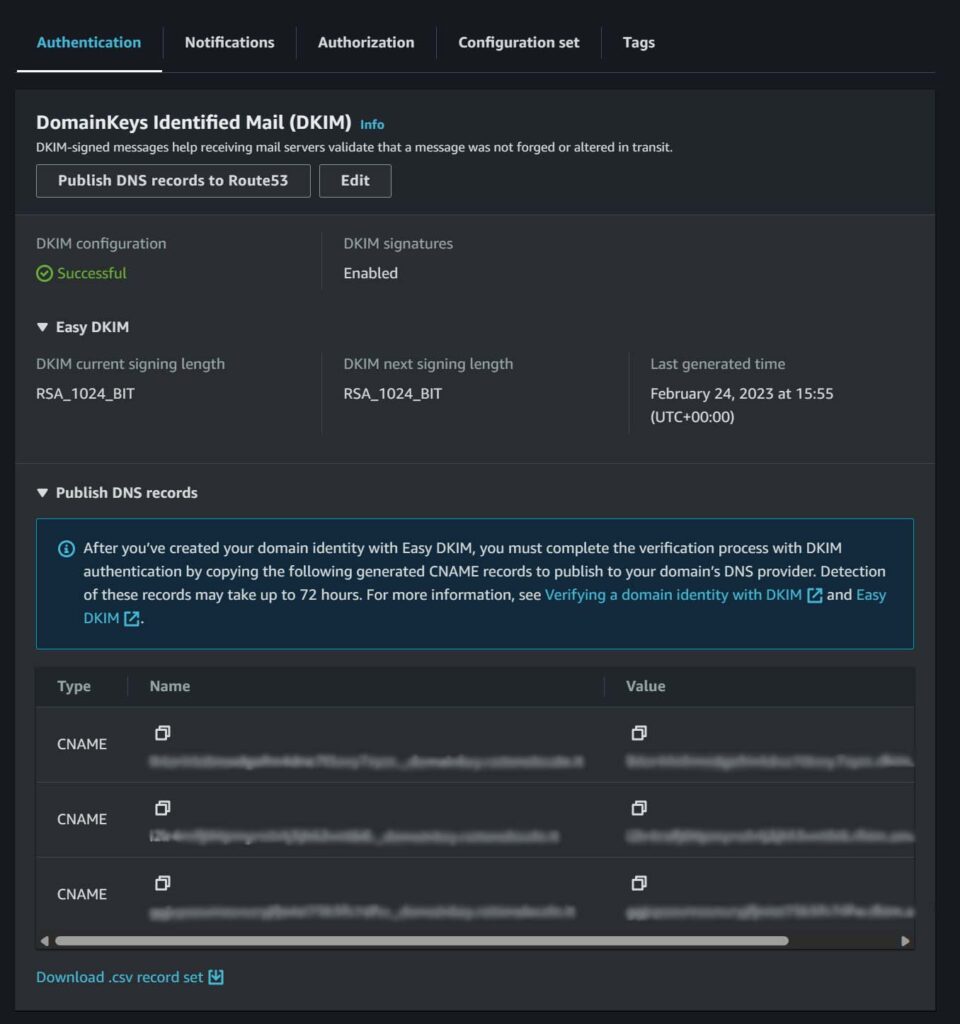
You will end up on a page with the details about your identity. In authentication section, open the “Publish DNS Records”. You will need to configure three CNAME records on your domain, and this is done where you are hosting your domain. If you are unsure, search on Google for your specific provider, for example “how to configure CNAME CloudFlare” or “how to configure CNAME Hostgator”.
In my example, you can see the DKIM configuration is already successful because I tested it before making the screenshot. You know DNS are set up correctly when you will see successful as well.
Congratulation, your identity is now ready to go! We need to configure some credentials to get access to it and use it in our app now.
2. Set up credentials for Email Automation
We now need to create a IAM user for our application that can use SES. All this fancy wording just means we need to create a pair of keys that we can use in our application to ask SES to send emails. In fact, we have AWS APIs for virtually any language – we just need to supply them with some credentials so that they can authenticate.
We are going to do this with two steps. First, we are going to create a IAM policy, a description of the authorization that we want (this policy will allow whoever has access to it to send emails with SES). Second, we will create a user and associate it with the policy.
Start by going to the IAM Console in AWS. Unlike SES, IAM is not region-specific: settings apply globally regardless of the region. There, select policies in the left menu and then click on Create policy.
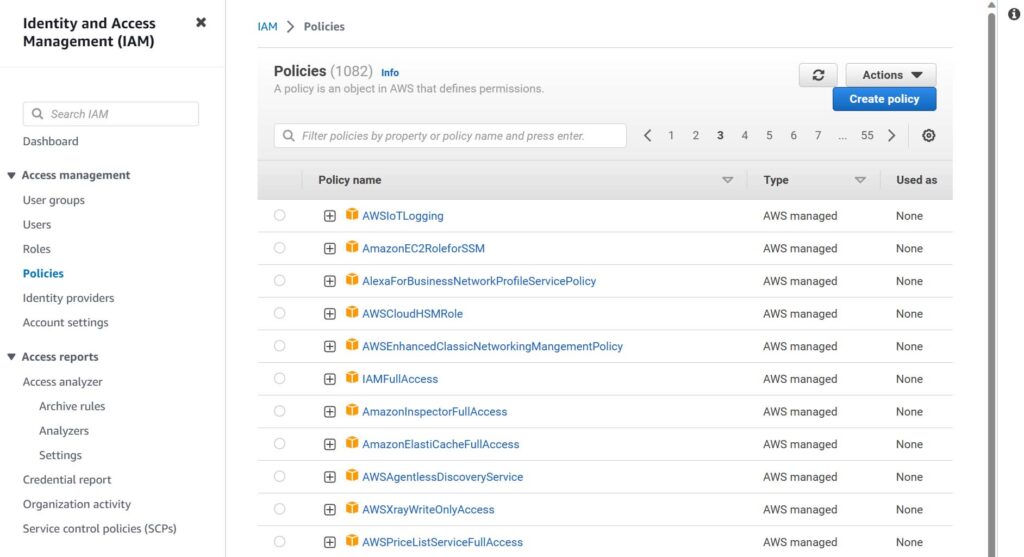
Then, choose JSON and input the following code. This is a policy that allows full access to all verified SES identities you have in your AWS account. If you want to have multiple verified identities to send emails from multiple domains, you can create a policy specific for each domain that you want by changing the resource value from * (which means all identities) to the specific ARN if the identity, that you find in the verified identity page.
{
    "Version": "2012-10-17",
    "Statement": [
        {
            "Sid": "VisualEditor0",
            "Effect": "Allow",
            "Action": [
                "ses:SendEmail",
                "ses:SendTemplatedEmail",
                "ses:SendRawEmail"
            ],
            "Resource": "*"
        }
    ]
}
Move to tags, which are optional, then go to the review where you create a name for the policy and optionally a description. Name the policy based on what it does, for example if you provide access to all domains, you can name it AmazonSESSenderFullAccess, if you restricted it to one specific domain you can do something like AmazonSESSenderDomain-example.com. The name is up to you.
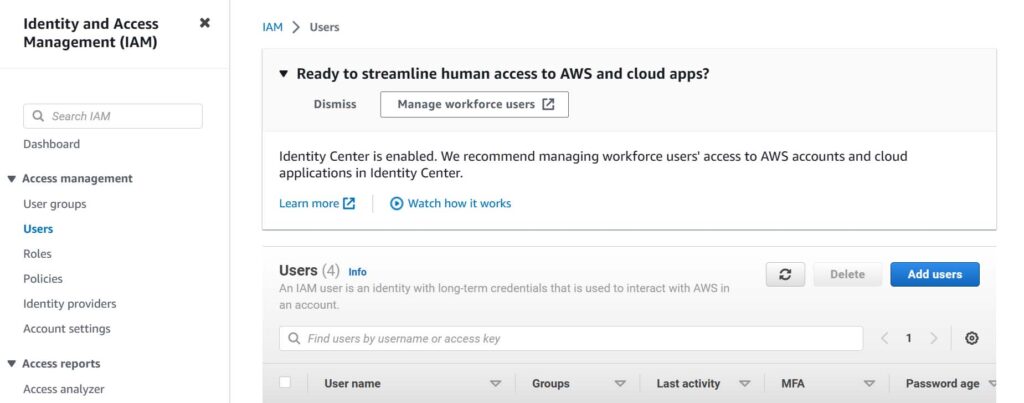
Now, still in the IAM dashboard, navigate to Users and click on Add users. Select a name for your user, and in the permissions tab choose Attach policies directly, search your policy and attach it. This is not the best practice, but it will work. If you want to do this in the proper way, then you should create a group first and attach the policy to a group, then add the user and add it as member to the group.
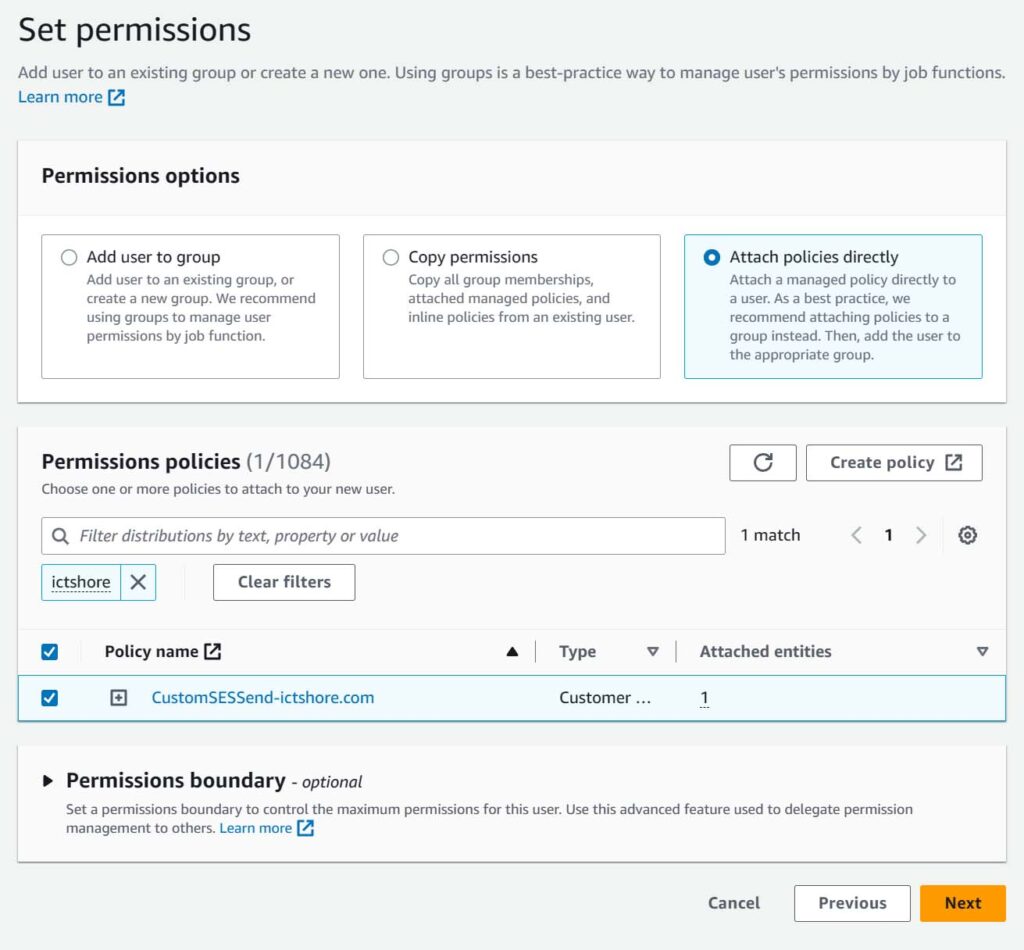
You will end up in a page to revie the user and where you can ultimately create it. Click on Create user.
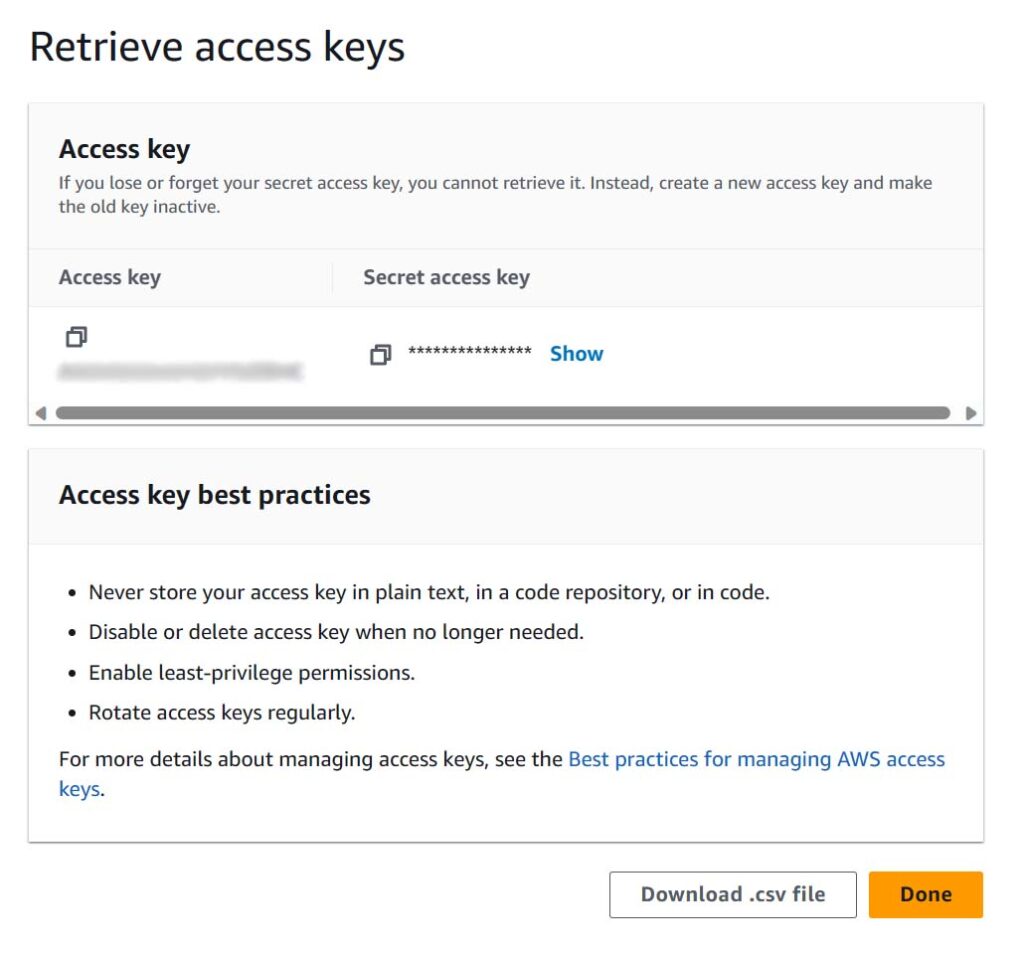
Once you create it, open it and navigate in Security credentials. Here, scroll down to Access keys and create new ones. Select what you need this key for, you can choose anything but the recommended option is “Application running outside AWS”. You can optionally put a description or skip that step, and then you can click on Create access key. Now, you need to retrieve it.
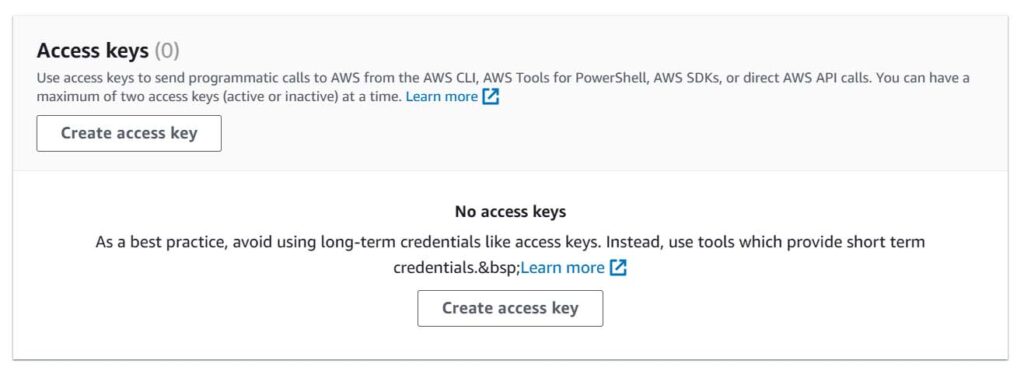
Copy the access key and the secret access key or download them as CSV. You will see the secret access key only in this page, and you will never be able to see it again. So, download it and keep it for your app to use.
Congratulations! We now have an IAM user that can send emails on behalf of your domain. We are ready to integrate this in your application.
3. Email Automation – Integrate SES in Your Code
The previous steps are literally the same for every user, application, domain. However, now we get into the specifics of your use case. This is because you want to integrate email automation with your specific application, customize it onto your own use case.
There are two ways of integrating SES in your code. You can either use AWS SDK – a special library that Amazon already prepared in your preferred programming language, or use the API. Using the API means you will have to perform HTTP calls on your own to the AWS services, and it is the way forward if your language is not supported.
You can check if your language is supported in AWS Developer Center. Most languages are supported: .NET, C++, Go, Java, JavaScript and Node.js, Kotlin, PHP, Python, Ruby, and Swift.
Personally, I work with Node.js and Python. However, you will need to pick the language your application is already using it. Then, search AWS SES <your language> SDK. For example, if you want to integrate SES with your WooCommerce website you will end up on this guide. You may probably need some help from Stack Overflow sometimes, for example PHP is not the most popular language to integrate AWS, so documentation may be limited. Search things like “AWS send SES email PHP”.
And here is the code. Of course, replace in the code the from address and the AWS access keys with the ones you have.
function sendEmailWithSes($to, $from, $subject, $message) {
	$amazonSes = new AmazonSES(array( "key" => $AWS_KEY, "secret" => $AWS_SECRET_KEY ));

	$response = $amazonSes->send_email(
		$from,
		array('ToAddresses' => array($to)),
		array(
			'Subject.Data' => $subject,
			'Body.Html.Data' => $message,
		)
	);
}
Then, if you want to integrate this function with WooCommerce, you could hook it to the payment complete action.
add_action( 'woocommerce_pre_payment_complete', 'send_confirmation_email' );

function send_confirmation_email( $order_id ) {

	$order = wc_get_order( $order_id );
	// Do something with the order, identify to address etc.
	// ...

	sendEmailWithSes($to, $from, $subject, $message);
}
A similar approach will work for any language and any application. We cannot dive deeper into this as it is not about email automation anymore, and it is much more about knowing the context around your specific use case.
Email Automation in Summary
Email automation should be easy and fast. With SES, it can be. Just verify your domain, create the IAM user needed to access it, and then integrate the AWS SDK in your application. This should be a great productivity tip, but you can find some more on productivity here.