
MySQL is a powerful database, and it’s free to use. Anyone in IT should know at least a little bit of MySQL. Thus, in this post, we will help you get started with MySQL, in about 10 minutes!
In this post, we will help you set up MySQL, both on Windows and Linux. We will then see how to give a couple of queries, but the focus is not about learning the MySQL syntax. The focus is on getting MySQL running!
Setup MySQL
Get started with MySQL on Windows
(If you are looking for Linux, just scroll down)
Install XAMPP
Installing MySQL on Windows can be painful. Fortunately, there are many tools coming to the rescue. Probably, the most popular is XAMPP, an easy-to-install application that prepares your PC to run the average website. With it, you can install apache (a web server that runs PHP), MySQL, but also FileZilla server and Tomcat (a web server that runs Java). This is everything we need! Particularly, we will use the first two items: apache and MySQL.
To download XAMPP, go to the official download page at this link.
Of course, look for the Windows version and download the one you prefer. In case you don’t know which one you should take, take the most recent one. Once you downloaded it, follow the boring next-next installation leaving everything at default. Obviously, you can change some settings if you are in the mood.
Once you finish with the installation, look from the Start menu for XAMPP and open it. This will open the control panel, that looks something like this.
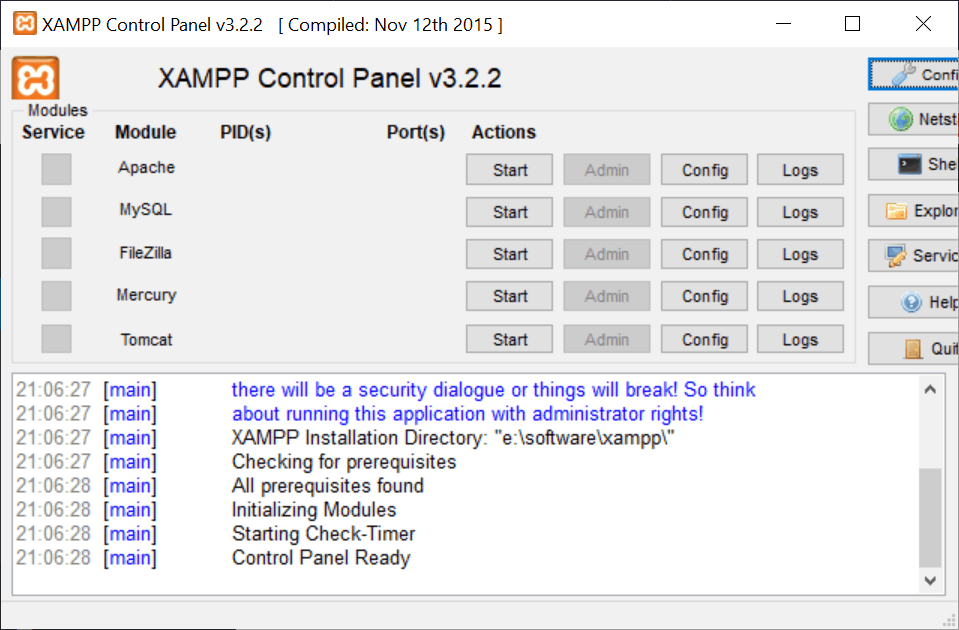
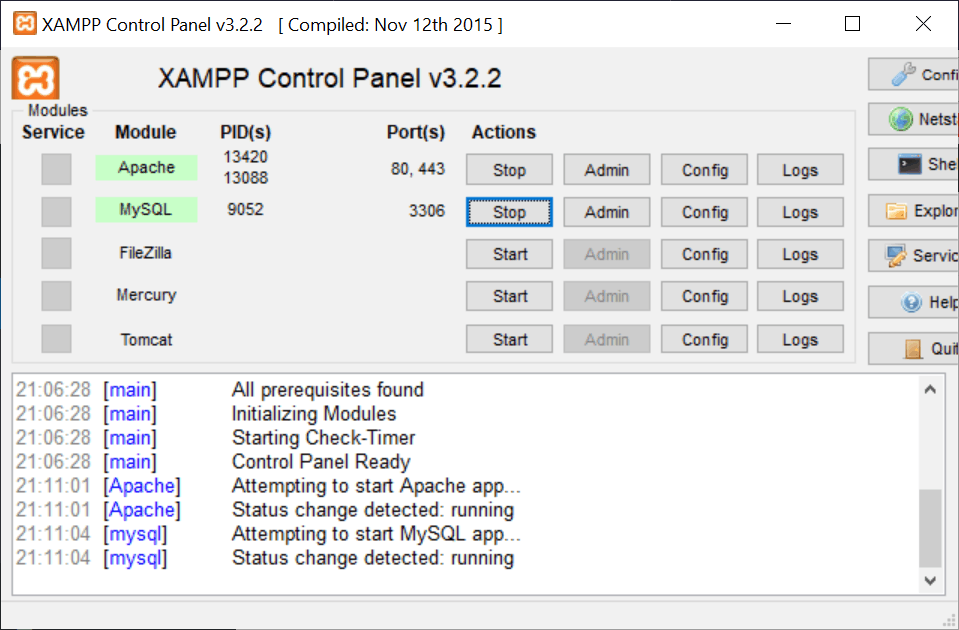
You now have MySQL on your PC, but it’s not running. We need to turn it on, and it’s easy enough – we just need to hit the Start button for the MySQL service.
However, by doing that we just have the database running. We also want to access it to make queries in a user-friendly way. What’s better than a web interface? We already have that, but we need to start Apache as well.
phpMyAdmin
Do you remember the beautiful web interface we were talking about? Well, that’s phpMyAdmin, and it is now running on your PC as a web application. To access it, you only need to visit http://localhost/phpmyadmin/ in any browser.
This will take you to a web page that looks a lot like the following. On the left, you have the list of databases you have on your system, and on the right a set of panels with the operations you can do. Since we haven’t selected any database, those operations are on the server itself.

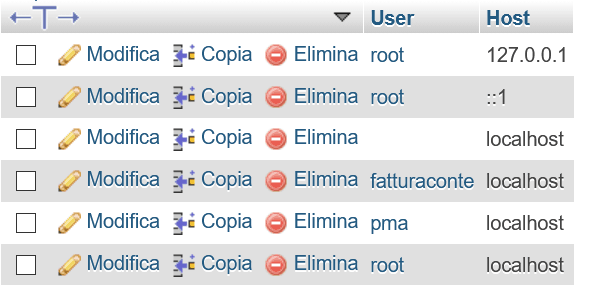
On the bottom of the main page, you have the Console. You can write your queries here. For example, write the following query to get a list of the users authorized to work on your MySQL database.
SELECT User, Host FROM mysql.user;Hit Ctrl+Enter to submit the query, and enjoy the result in the main view. You will see something like this.
Congratulations! You now have your MySQL installation working on Windows, and you know how to use it.
Problems starting Apache or MySQL?
No problem? Skip this section!
Hopefully, you arrived at this point without any problem. However, some problems may arise when you get started with MySQL on Windows. Particularly, you can have problems in starting Apache or MySQL services in XAMPP.
The most common problem you can have is about ports. Ports are like gates to access an application on your PC from the outside. Each application can use multiple ports, but two applications can’t use the same ports. That’s because, when your PC receives a connection on a port, it must know to which application to send the connection. Ports are just numeric IDs, and as you can see Apache needs port 80 and port 443, MySQL port 3306.
The problem arises if you have another program that uses the same ports, and only if you run it when that program is open. For example, a common issue is Skype that uses port 443. You can change the configuration of Apache, MySQL, or of the other program.
Get started with MySQL on Linux
For this post, we will use Ubuntu, but the same applies to any aptitude-based distro (like Debian). We will do everything from the command line.
First, we install MySQL as follows.
sudo apt update
sudo apt install mysql-server
Obviously, confirm everything with Y when requested. During the installation, you may want to restart services automatically if asked. Once everything is installed, we can configure it with the basic settings. Use the command below.
sudo service mysql start
sudo mysql_secure_installation
Here we are fist starting the service, and then hardening the database a little bit. You will also have to set a password to access your MySQL installation and select if you want to do some basic hardening of the database.
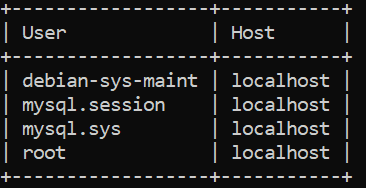
Once you finish, you can access your MySQL terminal with the following command.
sudo mysql -u root -pFrom there, you can enter the queries you want. For example, we can see the list of users in the system with SELECT User, Host FROM mysql.user;. It will show you something like the following.
All set! You can now freely use your MySQL on your system to set up all the databases you want!
Final words
As you see, installing the MySQL database is something quite easy. In about 10 minutes, you can be up and running with your queries. Since MySQL is free, light-weight and stable, you can use it for many applications, and many websites rely on this technology.
Of course, the focus of this post was not on the queries, but on getting started with MySQL installation. If you have problems during the installation, drop a comment and we will update the post to include some troubleshooting guidelines!
