MongoDB is one of the most popular NoSQL databases. Since it allows you to store huge loads of data, it is a great choice for modern applications. In fact, such an application must be able to scale easily to millions of users. Furthermore, MongoDB has great professional support, making it great for the enterprise world as well. However, MongoDB remains open-source, and this means you can use it for free if you’d like. In this MongoDB Windows Tutorial, we see how to install it on Windows and start working with it.
Why MongoDB?
Before we dive into our MongoDB Windows Tutorial, we should understand the benefits of MongoDB. As we said in the introduction, MongoDB is one step ahead of other NoSQL databases because of its great support. Still, this does not answer the question: why using a NoSQL database? To address this, we first need to understand the differences between SQL and NoSQL databases.
SQL databases are old school, yet the most popular choice. In a database of this type, you store information in tables. Each table represents a category of data, and each row is a piece of data. All pieces of data in that table have the same columns. For example, you may have the table “users” where the columns are “ID”, “username”, “email” and “password. In this table, each row will be a user. A table can only represent simple data because fields are standard. Thus, to represent complex data you have to use multiple tables and reference them in some way. In other words, you store data as flat and you use some logic later to make it rich. Of course, modern applications need complex data, flat is simply not enough to represent reality.
As the complexity of the data grows, the complexity of your SQL database will grow. It means more tables, more relationships, and higher demand for CPU power. You may start to think SQL is not the best approach and look for other solutions. This is when NoSQL comes in.
A quick comparison: SQL vs NoSQL
NoSQL databases are ridiculously simple. You represent the data you want as is, with its complexity. Each piece of data is not a row in a table, but a document. Documents do not have fixed length or fields, one can be completely different from another. When you need to load a piece of data from the database, you simply open that document as-is: all done.
Now we are ready to compare SQL databases with NoSQL databases. Be aware, this is not a full list, but you can use it to evaluate more or less your needs. There is no right or wrong choice, but only situations where SQL will be easier and other when NoSQL will be.
| Feature | SQL | NoSQL |
|---|---|---|
| Representation of Data | Flat, complex data represented through relationships. | Complex, data represented as objects or documents. |
| Redundancy (the same piece of data repeated multiple time in the database) | Rare and negligible | Likely, can be a concern. |
| Consistency (enforce relationships and constraints between different pieces of data) | Native | Not supported, you must implement it at the application level. |
| Scalability | Vertical (limited) | Horizontal (virtually unlimited, just add more servers). |
Since this is a MongoDB Windows Tutorial we will not focus on those differences. Instead, we will just install MongoDB and try it out. You should do the same: once you learn both SQL and NoSQL technologies, you can evaluate what’s best for you.
MongoDB Windows Tutorial
Getting MongoDB on Windows
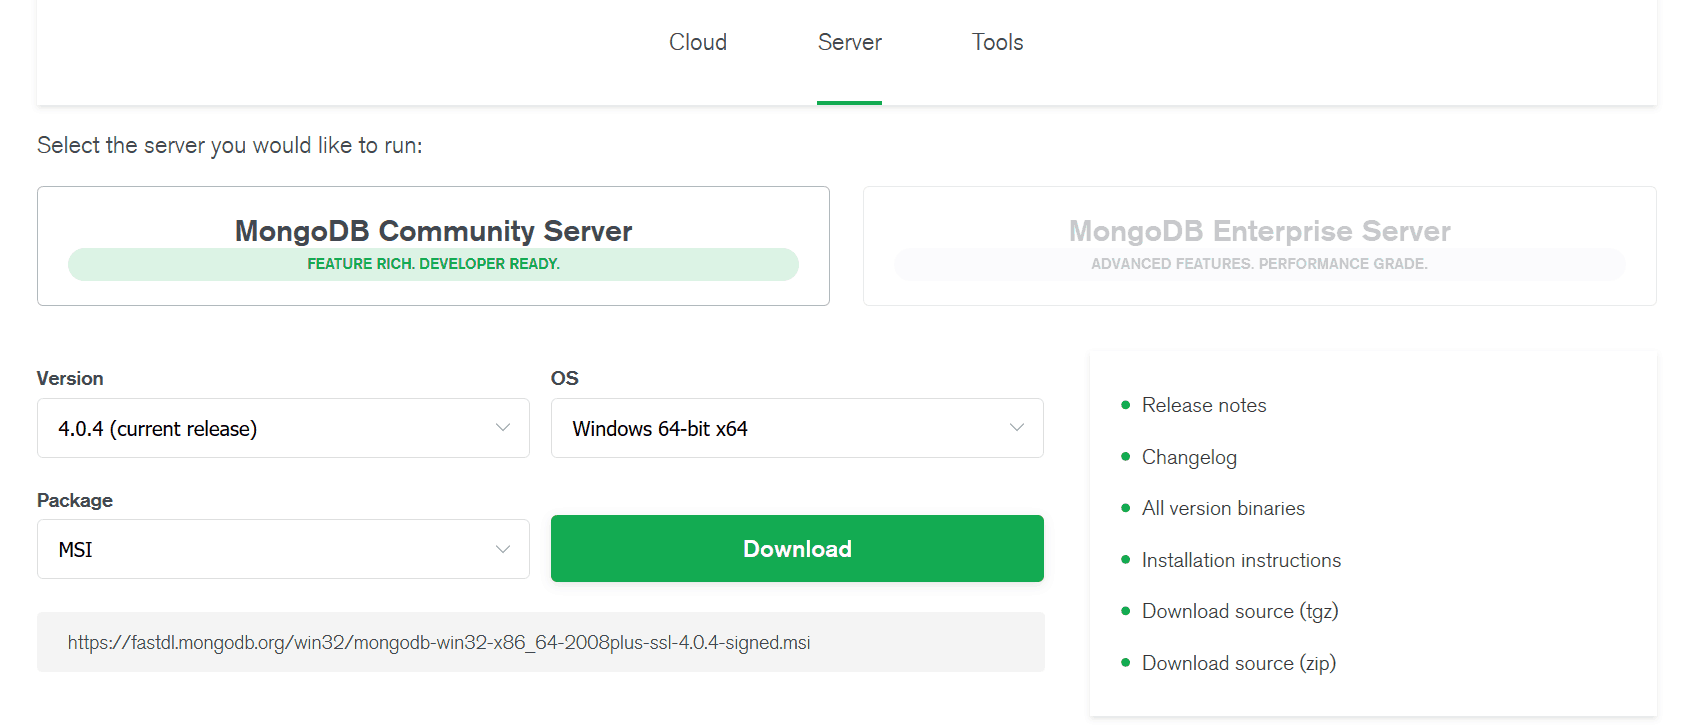
MongoDB comes in two versions: Community Edition (free and open-source), and Enterprise Edition. We will go for the Community Edition (or CE). To download it, you should go to the official MongoDB download page. Here, select Version, target OS, and type of download. Since this is a MongoDB Windows Tutorial, we will install it for Windows 64-bit. Instead of downloading the ZIP package, we chose the MSI. It will make things simpler.


The MSI will be roughly 200MB (depends on the version). Once you download it, run it. Windows will notify you to run only trusted files, and we will click “OK” and continue. The setup is just a next-next. You can opt for the complete installation, or go through the custom configuration. In case you opt for the latter, you can select where to install MongoDB and other settings.
Configure PATH
Now we want to have easy access to Mongo. To do that, we need to add the bin folder of Mongo to our PATH variable. Here are the simple steps.
- In the start menu, search for This PC and right-click on it. Then, select Properties
- On the left menu, click on Advanced system settings
- Click Environment Variables…
- Select Path from the top list, then click Edit…
- Now click New and write the path to your MongoDB bin directory (mine was
E:\Software\MongoDB\bin, but it is not the default)
All done! Close the windows by clicking OK, and we are ready to go.
Using MongoDB on Windows
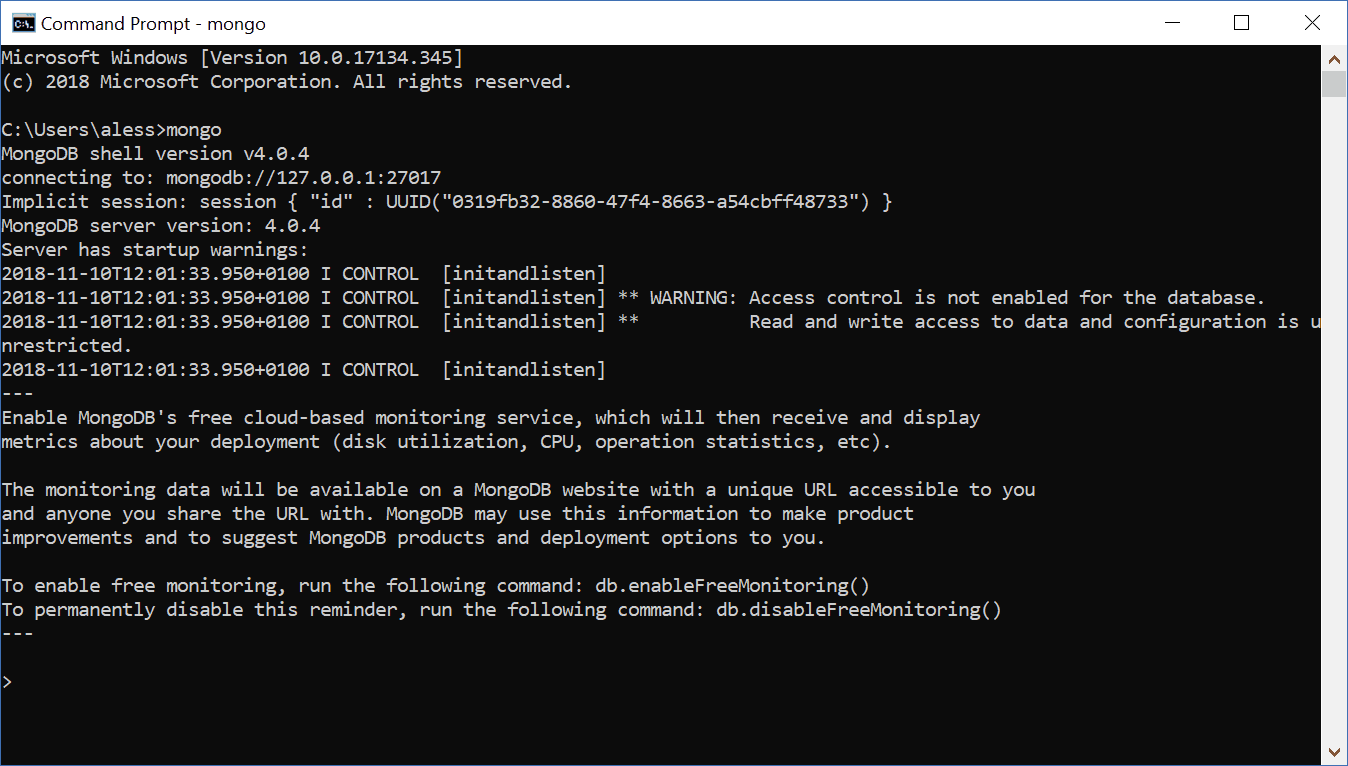
After adding our MongoDB folder to the Path variable, we can use MongoDB from the CLI. Open your prompt and simply type mongo. This will open the Mongo CLI.


We can have multiple databases in our MongoDB. To see them, issue show dbs. You should get the following.
> show dbs
admin   0.000GB
config  0.000GB
local   0.000GB
With the use command, we can select an existing database or create a new one. Here we create the test database.
> use test
switched to db test
Interacting with Data
To conclude our MongoDB Windows Tutorial, we need to know how to deal with the data in our database. Note that if we issue show dbs now we don’t see our DB because it has no data. The first thing we want to do is adding some data. In MongoDB, data are grouped in collections of similar items. You name the collection the way you want, in this example, we named it inventory. We use the insertMany function to add a list of objects, in the form of JSON.
> db.inventory.insertMany([
... { item: "Gasoline", quantity: 800, unit: "l", location: "Warehouse A" },
... { item: "Light bulbs", quantity: 10, location: "Warehouse B" },
... { item: "Crate", size: { h: 0.15, w: 0.50, d: 2, unit: "m" }, location: "Dock" }
... ]);
{
        "acknowledged" : true,
        "insertedIds" : [
                ObjectId("5be6bf92a8e29ee6efce56f9"),
                ObjectId("5be6bf92a8e29ee6efce56fa"),
                ObjectId("5be6bf92a8e29ee6efce56fb")
        ]
}
> show dbs
admin   0.000GB
config  0.000GB
local   0.000GB
test    0.000GB
Note that objects are different, they don’t have all the same properties. The crate has the size, the Gasoline has the unit and the Light bulbs have neither. That’s completely fine with Mongo. This operation will return the list of objects created, and now we can see test among our DBs. Now that we have some data we can do some searches, thanks to the find function. This expects a JSON to describe a filter, and if the filter is empty it will return the entire collection.
> db.inventory.find({})
{ "_id" : ObjectId("5be6bf92a8e29ee6efce56f9"), "item" : "Gasoline", "quantity" : 800, "unit" : "l", "location" : "Warehouse A" }
{ "_id" : ObjectId("5be6bf92a8e29ee6efce56fa"), "item" : "Light bulbs", "quantity" : 10, "location" : "Warehouse B" }
{ "_id" : ObjectId("5be6bf92a8e29ee6efce56fb"), "item" : "Crate", "size" : { "h" : 0.15, "w" : 0.5, "d" : 2, "unit" : "m" }, "location" : "Dock" }
Now, here we have three example queries.
> db.inventory.find({ location: "Warehouse A"});
{ "_id" : ObjectId("5be6bf92a8e29ee6efce56f9"), "item" : "Gasoline", "quantity" : 800, "unit" : "l", "location" : "Warehouse A" }
>
> db.inventory.find({ unit: { $exists: true } });
{ "_id" : ObjectId("5be6bf92a8e29ee6efce56f9"), "item" : "Gasoline", "quantity" : 800, "unit" : "l", "location" : "Warehouse A" }
>
> db.inventory.find({ location: { $regex: /^Warehouse.+/}});
{ "_id" : ObjectId("5be6bf92a8e29ee6efce56f9"), "item" : "Gasoline", "quantity" : 800, "unit" : "l", "location" : "Warehouse A" }
{ "_id" : ObjectId("5be6bf92a8e29ee6efce56fa"), "item" : "Light bulbs", "quantity" : 10, "location" : "Warehouse B" }
The first searches for items where the location is exactly “Warehouse A”. The second list all items where the unit property exists, regardless of its value. The third, instead, searches on the location property using a regular expression. To be specific, it looks for all fields where the location starts with “Warehouse”.
Some cleanup
If you are done with the tests and you simply want to remove the database you are using, call db.dropDatabase(). This will effectively remove it from memory.
Wrapping it up
Congratulations! After this MongoDB Windows Tutorial, you should be up and running on your Windows machine to work with Mongo. Now, the next step is connecting to the DB from your application. MongoDB connectors exist for all popular programming languages, ready to go.
What do you think about MongoDB? Will you use it instead of a SQL database in some projects you are working on? Let me know in the comments.